< Anterior | Avançar >
· Copy a color from one object to another
· Match an objects normal, highlight and click colors
· Save the project
· Preview the project
How Long Will It Take?
This lesson takes approximately 45 minutes to do.
Starting the Lesson
If you're continuing from Lesson 1, you should still have AutoPlay running with the Tutorial project open. If so, you're ready to move on to the next exercise: Choosing a Page Background.
Otherwise, you'll need to open the project file that you saved at the end of Lesson 1.
1 ) Op e n t h e Tu t o r i a l. a u t opl ay f il e t h a t y ou s ave d in L e ss on 1 .
When you save a project, AutoPlay automatically creates a project folder for it inside your My Documents\AutoPlay Media Studio 8\Projects folder. This project folder is where everything that belongs to the project is stored, including the project file, which contains all of the settings used in the project.
The project folder and the project file always have the same name that you gave to the project when it was created. The project files name ends with a .autoplay file extension.
Since you named this project Tutorial in Lesson 1, the name of the project folder will be Tutorial, and the name of the project file will be Tutorial.autoplay. So, the path to the project file should be something like:
...\My Documents\AutoPlay Media Studio 8\Projects\Tutorial\Tutorial.autoplay To open the project, you just need to open that project file.
Choosing a Page Background
Each project is made up of one or more pages. A page in AutoPlay is very much like a page in a book. Just like in a book, each page can have different items on it, such as different photographs and text.
Of course, in AutoPlay, theres a lot more that you can put on a page, from text and graphics to interactive buttons and full-motion video. (You'll see the different kinds of objects you can put on a page as you go through the lessons in this users guide.) But for now, lets just focus on the page surface itself.
1 ) C li ck on t h e p a g e s u r f ace .
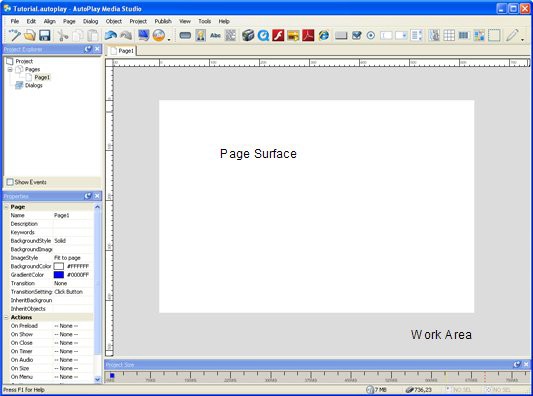
The page surface is shown in the middle of the work area. (Its the big white rectangle.) When you click on the page surface, the pages settings are displayed in the properties pane.
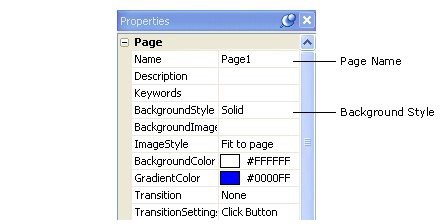
The properti es pane
In the properties pane, you can see that this page is named Page1, and that its background style is set to Solid.

Tip: You can click on the page surface at any time to select the page and see its settings in the properties pane.
Since a big white rectangle is a bit boring for this project, lets make the page more interesting to look at.On the color chooser, hold your mouse over one of the color squares until the name of the colorHexadecimal color values aren't as complicated as they look. They're just a compact way of describing colors.If you moved up to the parent Images folder, you would see the Backgrounds folder, along withTo reach the files in the Backgrounds folder again, just double-click on it. When you double-clickMost of the screenshots throughout this users guide were taken using the List view. AutoPlay Media Studio uses the Thumbnail view by default.The Gallery pane gives you another convenient way to change the page background. Lets use it to change the background to a different image.Whenever you drag and drop an image that is larger than 75% of the page size, AutoPlay asks you if you want the image to be used as the page background. (An image that big would cover most of the page anyway.)If you answer Yes, the pages Image setting will automatically be set to use that image as the background. (If you answer No, the image will be dropped onto the page as an image object.)Some people prefer double-clicking to make their changes, while others prefer to use theClicking the Gallery button takes you directly to the gallery folder that is most convenient for the type of file you are adding.
In this case, because you're adding an image object, the Gallery button takes you to the Gallery\Images\Elements folder which is where the file you want to add is located.When you select the A-001.png file and click OK, that image file is copied into your projectIf you look closely, you'll see that the image is surrounded by a blue rectangle with a bunch of little white squares on it. This blue rectangle is the objects bounding box.Another thing you'll notice when an object is selected is that its settings appear in the properties pane.Does the File path seem a bit odd to you?You're probably used to seeing paths in Windows that start with a drive letter, like C:\Temp or D:\Program Files\Blah blah blah. So why doesn't this image object have that kind of path? Well, it's actually quite simple. Instead of showing you the full path, like you normally see in Windows, AutoPlay shows you only the part of the path that is relevant to the project. In this case, its the part of the path inside the projects CD_ROOT folder. This makes the path shorter and easier to read. This kind of partial path is what's known as a relative path.In addition, the objects current position and size are displayed on the status bar.As you move the object, the position readout changes on the status bar.Once an image has been added to your project, it becomes even easier to add it a second time.Heres how it works: whenever you add an image to your project, its copied into your projects Images folder first. Then the project uses that copy instead of the original.
(Which is why the File setting is always a path like "AutoPlay\Images\redshoes.jpg" even if you added the file from "C:\My Documents\Graphics\Pictures" of clown feet.)Since there are three image files that you've added to the project so far, you should see three files in the Images folder: the two images you used for the page background (including 630B1151.jpg), and A-001.png.As you resize the object, the size readout changes on the status bar.Note that the contents of the Text setting are automatically selected for you. This makes it easy for you to change the objects text right away. When you type in Ted Sellers, it instantly replacesThis time, the object isn't added in the upper left corner...instead, it appears at the location where you right-clicked on the page.Were going to use this object to display Teds email address, but for now the default text is okay.Because the new object is automatically selected for you, you can create a chain of label objects very quickly by selecting an object and pressing Ctrl+D a few times.To change the text that is displayed in the label object, highlight the contents of the Text setting in the properties pane, and type in the text that you want it to display.As you type in the new text, the objects bounding box automatically resizes to fit.As you type in Teds mailing address, make sure you press Enter at the end of each line.You may notice some red squiggles under the words Fakereal and Realfake. These red squiggles are the spell checkers way of alerting you that those words aren't in its dictionary. We don't care if they aren't, since the whole address is fake, but if you wanted to, you could click the spell check button to step through all such flagged words and choose from a number of suggested spellings.Okay.If the current value is the last item in the list, it just goes back to the beginning. Since the FontBold setting only gives you two options to choose from - namely, true and false - double- clicking on the value goes from false back to true.When you set the Normal color, you should see the label objects text change from black to light blue-grey.Watch out for those crooked fonts...Some italic or cursive fonts can pose a bit of a problem for the label object. For various technical reasons, a font that leans to the right a lot can sometimes end up with the last letter extending past the right edge of the labels bounding box. When this happens, the part that falls outside the bounding box wont change colors along with the rest of the text-only the text inside the labels bounding box responds to mouse-overs and clicks.The other way to duplicate a color is to copy and paste the hexadecimal value from one setting to another.That's it...we don't have to bother changing any of the colors, because all of those settings were already made for us simply by duplicating the object.Congratulations! You've just protected yourself from having to redo everything in the event that a computer glitch (or four-year-old)
causes your computer to spontaneously shut down.In this lesson, you learned how to:
< Anterior | Avançar >