
Hexadecimal color values aren't as complicated as they look. They're just a compact way of describing colors.
Each color is made up of three values: one for the amount of red in the color, one for the amount of green, and one for the amount of blue. (Computers make different colors by mixing red, green and blue light together on the screen.)
If you've used any graphics tools like PhotoShop (or even MS Paint, for that matter), you're probably used to setting the RGB value for a color using numbers between 0 and 255. The hexadecimal color #99CCFF is just a compact way of saying: set Red to 153, Green to 204, and Blue to 255.
Each pair of digits in the color represents either red, green or blue, in this pattern: #RRGGBB. (Two digits for red, then two digits for green, and then two digits for blue.) So what do the letters like FF and CC mean? Well, that's just hexadecimal, which is a compact way of writing numbers.
Hexadecimal (or hex for short) extends the regular decimal numbers (0-9) with six extra digits (A-F). So, if you were counting to 18 in hexadecimal, you would go: 0...9, A, B, C, D, E, F, 10,11,12. Understanding hexadecimal is a bit technical, but all you need to know to make hexadecimal color values is that letters are bigger than numbers. (A0 is bigger than 99, DB is bigger than D7, etc.) In #RRGGBB notation, bigger values mean more of that color. FF is the
biggest value you can have, so #FF0000 means 100% red, 0% green, 0% blue. #FFFFFF is white (100% red, green and blue), and #000000 is black (no red, green or blue light at all).
As for the number sign (#) in front, it simply indicates that hexadecimal numbers are being used, kind of like how a dollar sign ($) lets you know that $5.24 means five dollars and 24 cents.
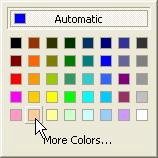
4 ) C h a ng e t h e b ack g r ound s t y l e f r o m S olid C olo r t o G ra di e n t , a nd s e t t h e g ra di e n t c olo r t o T a n ( # FF CC99 ) .
To change the pages background style, click on the BackgroundStyle setting in the properties pane, then click the select button and choose Gradient from the list.

To change the gradient color, click on the GradientColor setting, and then click the select button to bring up the color chooser. Find the color square named Tanit should be the second color from the left on the bottom row and click on it.
The page background should now be a gradient between the background color at the top (Pale Blue), and the gradient color at the bottom (Tan). A gradient is just a smooth blend from one color to another. So, the page surface blends smoothly from Pale Blue at the top, to Tan at the bottom. (I like to call this Desert Sunrise.)
Using a gradient is an easy way to create a simple, attractive background for the page.
5 ) C h a ng e t h e b ack g r ound s t y l e f r o m G ra di e n t t o I ma g e .
Setting the background style to Image lets you specify an image for the page background. This does exactly what it sounds like: the image is stretched over the page surface, and any objects that you put on the page will appear on top of the image. (Well select a background image in a moment.)
Note that the background color changes from a gradient to a single color, specifically the BackgroundColor setting. This is the color that any uncovered parts of the page will have if the image style is set to Actual size and the image is smaller than page.
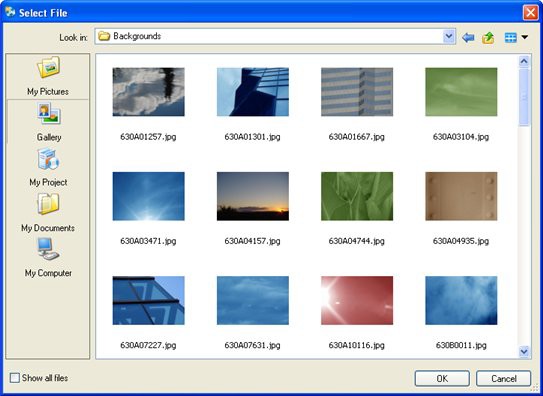
6 ) C li ck on t h e Back g r ound I ma g e s e tt ing, a nd t h e n c li ck t h e b r ow s e bu tt on. Wh e n t h e S e l ec t Fil e di a log op e n s , c li ck t h e G a ll ery bu tt on.
Selecting an image is done using the Select File dialog. To open the Select File dialog, click on the BackgroundImage setting, and then click the browse button.
When you click this button, a Select File dialog opens so you can browse for a file. Clicking the Gallery button on the left side of this dialog gives you access to the complete library of files that came with AutoPlay.

Cli ck the Gall ery button
Note: There are five buttons on the left side of the Select File dialog: My Pictures, Gallery, My Project, My Documents, and My Computer. The My Project button is for files that you've already added to your project; the Gallery button is where you'll find the files that came with AutoPlay; and the other three buttons let you bring in files from other locations on your computer.
7 ) T ry n av ig a t ing in t h e S e l ec t Fil e di a log. Wh e n y ou f ind a n i ma g e t h a t y ou li ke , c li ck O K t o s e l ec t i t a s t h e b ack g r ound i ma g e .
Because AutoPlay knows that you're looking for a page background, when you click the Gallery button on the Select File dialog, it automatically takes you inside the Backgrounds folder.
Although you will find many nice backgrounds in that folder, you can navigate to another folder in the Select File dialog if you want.
Navigating in the Select File dialog is just like browsing for files in Windows. To move back up or out of a folder, click the move up button at the top of the dialog.
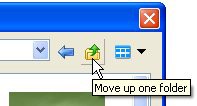
The Move Up button