Note that the contents of the Text setting are automatically selected for you. This makes it easy for you to change the objects text right away. When you type in Ted Sellers, it instantly replaces
the default text.
![]()
When you click OK, the label objects properties are updated.
2 ) M ake t h e l a b e l obj ec t bigg er b y d ra gging on e o f i t s re s i z e h a ndl e s .
When you resize a label object, the text inside it gets bigger or smaller. In fact, resizing a label objects bounding box is just another way of setting the objects font size.
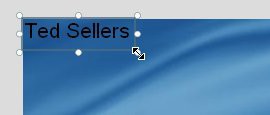


There are two things to remember about resizing label objects. First, label objects always maintain their aspect ratio as you resize them. (You probably noticed this as you were resizing the object.) This is because changing the font size changes the width and height of the text at the same time.
Second, the size of the label object may not always match the size you set it to. The bounding box might end up a tiny bit larger or smaller as the text snaps to the nearest font size. You wont always be able to get a label object to fit perfectly to a specific width and height in pixels...but AutoPlay will get the text as close as it possibly can.
![]()
Tip: When resizing label objects, try not to think in terms of pixels; instead, think in terms of points, as in a 12 point font. Or better yet, just resize the object until it looks the way you want it to, and forget about pixels and points altogether.
3 ) S h r in k t h e l a b e l obj ec t b ack down t o i t s o r igin a l s i z e .
To make the label object smaller, just drag the same resize handle back to where it was before, more or less. (Don't worry about getting it exactly the same size; the point of this step is just to avoid having a big text object getting in your way during the next couple of exercises.)
4 ) C li ck t h e Ne w L a b e l Obj ec t bu tt on t o a dd a no t h er l a b e l obj ec t .
D oubl e - c li ck on t h e n e w obj ec t , t y p e R E A L T Y L T D . in t o t h e T ex t
f i e ld, a nd c li ck O K .
You can also add an object by clicking the New Label Object button on the toolbar.
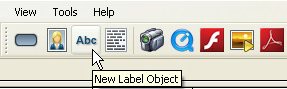
Clicking the New Label Object button is just like choosing Object > Label from the menu. It automatically adds a new label object to the top-left corner of the page. Since you already had a label object there, the result might look a bit jumbled, with one label object on top of the other. Don't worry about that for now; well move the new object in the next step.
Double-click the new object to bring up its Label Properties dialog. For now, we just want to change the default text to R E A L T Y L T D . (without the quotes). Note that we've put a space between each letter in order to spread the letters out a bit, and we've put two spaces between the words REALTY and LTD. to make them look like separate words.
Once you click OK, the text on the object is updated.
5 ) Dra g t h e n e w l a b e l obj ec t down s o y ou ca n s ee i t b y i t s e l f .
Moving the new object over makes it easier to see what's going on.
6 ) R igh t- c li ck on t h e p a g e s u r f ace a nd c hoo s e L a b e l f r o m t h e r igh t- c li ck me nu.
You can also add an object by right-clicking on the page surface and choosing the object type from the right-click menu.
![]()
Note: The right-click menu is said to be context sensitive in that it displays different items according to what you right-clicked on. For example, right-clicking on the page surface will present a different menu than if you right-clicked on an object.