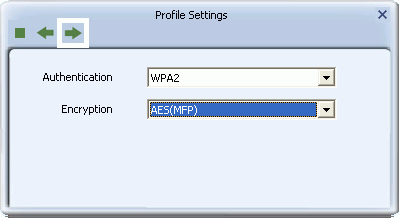
- WPA-PSK or WPA2-PSK
- WEP
- WAPI-PSK
- WAPI-CA
- No Security
-
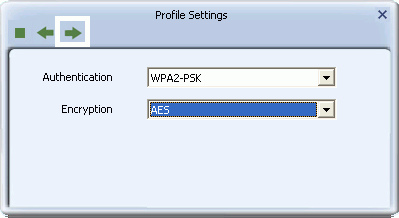
WPA-PSK or WPA2-PSK
- If the Utility shows that WPA-PSK or WPA2-PSK security is detected, click the right arrow to save your settings.
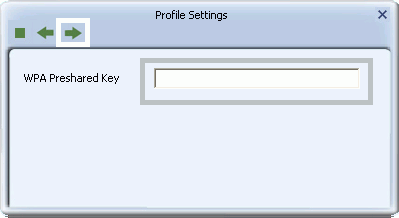
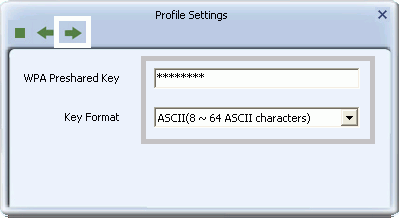
- In the screen that displays, in the 'WPA Preshared Key' field, type a security key, the same as that used by the AP or wireless router to which you are connecting. Click the right arrow to save your settings and connect to the network.
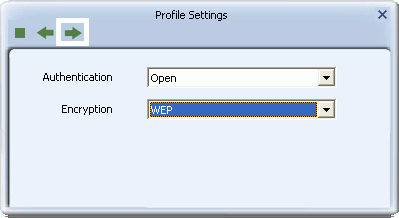
WEP
- If the Utility shows that WEP security is detected, click the right arrow to save your settings
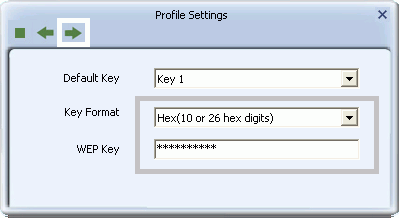
- In the 'WEP Key' field, type the same WEP key as that configured on the AP or wireless router to which you are connecting, and ensure that 'Default Tx Key' and 'Key Format' settings are also the same. Click the right arrow to save your settings and connect to the network.
802.1X, WPA, or WPA2
- If the Utility shows that 802.1x, WPA, or WPA2 security is detected, click the right arrow to save your settings
- Select the EAP Method (Extensible Authentication Protocol) and Tunnel Authentication method, and if required, the Tunnel ID method and Tunnel Mode, and enter the user name and password, using the settings provided by your organization's network administrator. For more information on settings for these fields and for those in the screens that follow, see Setting Up Enterprise Security. Click the right arrow to save your settings.

WAPI-PSK
- If the Utility shows that WAPI-PSK security is detected, click the right arrow to save your settings.
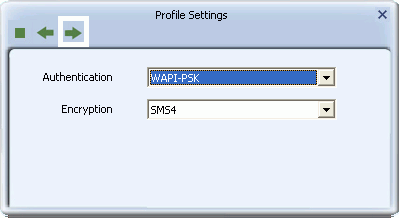
- In the 'WPA Preshared Key' field, type a security key, and select a Key Format setting, the same as that used by the AP or wireless router to which you are connecting. Click the right arrow to save your settings and connect to the network.
WAPI-CA
- If the Utility shows that WAPI-CA security is detected, click the right arrow to save your settings.
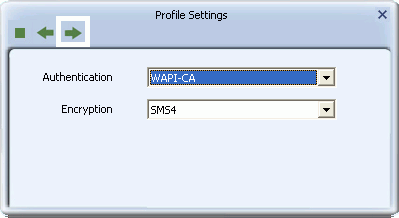
- If you have a WAPI certificate already installed, in the Select Mode field, select Auto and click the right arrow to save your settings and connect to the network. Otherwise, if there is no WAPI certificate in your system, go to Setting Up Enterprise Wireless Security: Setting Up WAPI-CA for information on installing a WAPI certificate.

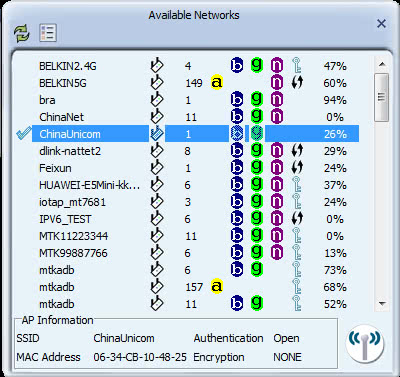
No Security
If your network has no security (not recommended), no further settings are required. Click the right arrow to save your settings and connect to the network
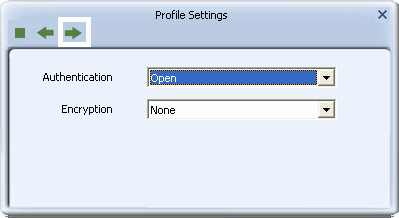
- If the Utility shows that WPA-PSK or WPA2-PSK security is detected, click the right arrow to save your settings.