Determining which DLLs need to be included in a package and which need to be loaded by the operating system can be determined using the advise below.
Step 1. Determine the minimum platform you plan to support.
The application must run normally on these platforms before Thinstall is applied. Thinstall does not magically allow applications to run on platforms they originally would not work with. For example, if you take an application that requires specific features or functions from Windows XP and try to make it run on Windows 95, it will not work with or without Thinstall. Thinstall allows application that originally function on Windows 95 to run without needing installation.
The next step is to determine which DLLs are used by application normally for each minimum platform.
Step 2. Determine DLLs and data files required by your application.
Static analysis - The import table.
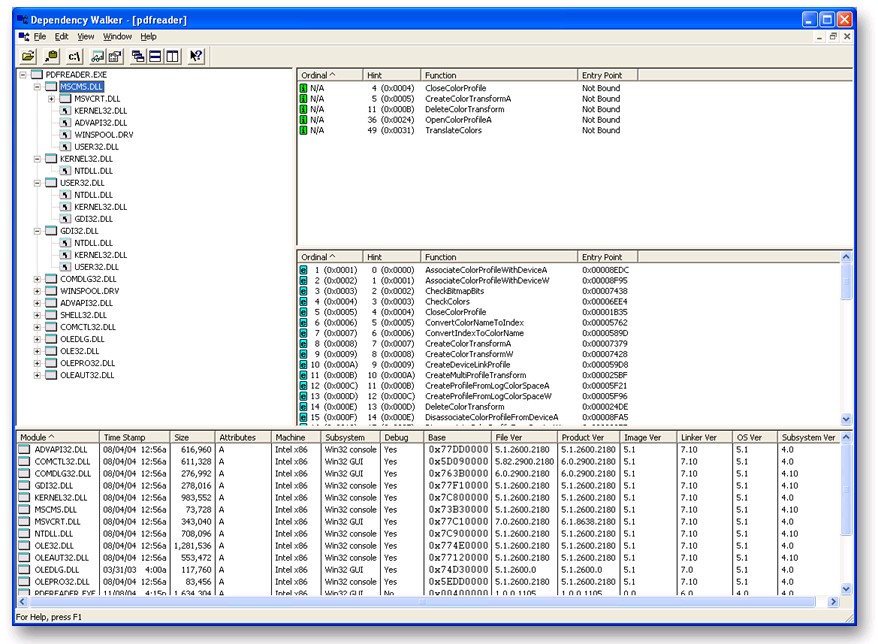
All EXE files have what is known as the "Import Table", which contains a list of functions being imported from other DLLs on the system. Any DLL listed in the import table must be present on the file system or Windows will display the an error and not run the application.
Two tools that will show you import table information for an EXE include DEPENDS.EXE and DUMPBIN.EXE, both are included with Visual Studio. There are also numerous Freeware/Shareware applications that can help display this information, PE Explorer is one of the nicer 3rd party tools in this category.
A quick look at DEPENDS.EXE
Removing dependencies using Thinstall
Any DLL added to your Thinstall project will automatically be removed from the import table of the resulting executable. Instead of the DLL being loaded by Windows it will be loaded by Thinstall. As well, you can cause Thinstall to load DLLs from the hard drive instead of Windows by adding it to the list under External DLLs loaded. Any DLL name added to the "External DLLs loaded" list will also be removed from your EXE import table. Instead of Windows resolving the imported functions, Thinstall will perform this operation. The main difference between the two behaviors is:
1. Dlls loaded by Thinstall may resolve imports from the internal archive package as well as from DLLs loaded by the operating system. For example if A.DLL is located in your Thinstall package, and B.DLL is located on the file system, if you call LoadLibrary("B.DLL"), it will fail unless B.DLL is added to the "External DLLs Loaded" list.
2. DLLs loaded by Thinstall will not show up as a loaded module for debuggers and programs like System Internal's Process Explorer.
3. DLLs loaded by Thinstall will have full access to the virtual environment. Dlls loaded by Windows will not have access to the virtual environment unless they are specified in the External DLLs modified list.
Dynamic analysis
The import table will only show DLLs required for your application to be loaded into memory by Windows. At runtime your application may also use various DLL and OCX files from the hard drive by explicitly calling LoadLibrary, LoadLibraryEx, or indirectly by using COM functionality such as CoCreateInstance and CoGetClassObject. Determining a list of DLLs loaded by your application at runtime can be done using most Debuggers such as Visual Studio. If you run your application under a debugger, the output window will display list of DLLs loaded by the application. By exercising all of the functionality in your application you should be able to uncover the DLLs needed.
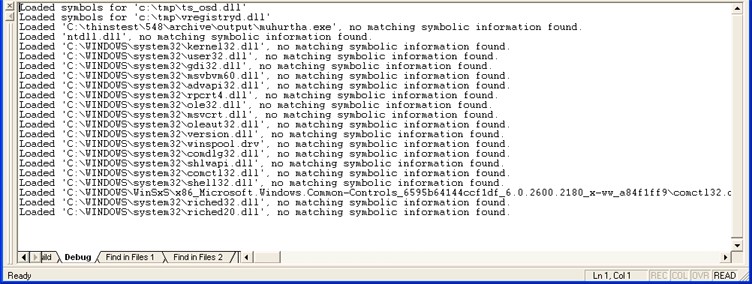
Another method of determine DLLs is to use Thinstall's built-in logging mechanisms, as discusssed here.
Step 3. Determine which DLLs should be included
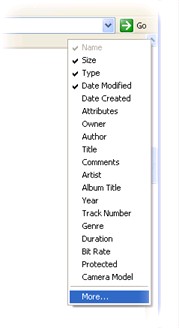
You should never include DLLs which have the product name "Microsoft Operating System". If you copy all of your DLLs to a single directory, explorer allows you to sort DLLs by version information and quickly delete all the DLLs that are marked "Microsoft Operating System". To do this, right-click on the explorer tabs, select "More..." and then check "Product Name" you will be able to see the following.

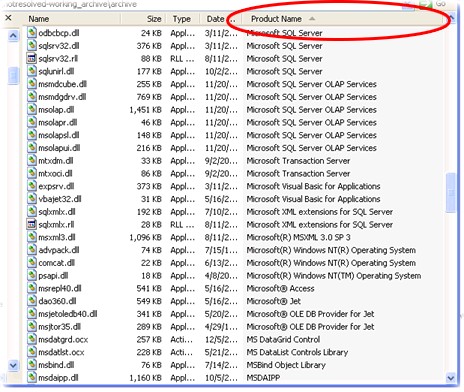
DLLs such as Kernel32.dll, user32.dll, gdi32.dll, etc will display the product name "Microsoft Operating System". These DLLs should not be included in your project.
Determining non-operating system DLLs to include
You should consult a "clean" install of your minimum operating system target. If it contains a DLL in question already under c:\windows\system or c:\windows\system32 (c:\winnt for NT/2k), then you do not need to include it in your archive. it is important to consult your minimum target operating system because later versions of Windows may include the DLL but not previous versions. It is also important to consult a "clean" install of Windows because installation of any other application after this initial clean starting point may add additional DLLs to c:\windows. For example, MSVBVM60.DLL is included with Windows XP, but it is not installed on Windows 95 and 98 by default. So if you plan to support Windows 95 & 98 you should include this particular DLL.
What virtual path should I use when adding DLLs?
The best virtual path to place most DLL & OCX files is at "%InstallPath%\DLLNAME.DLL". Some larger 3rd party libraries may have tree structures that need to be relocated. For an example of how to do this, see the Crystal Report Example.
Step 4. Recording registry scripts for COM controls
After you have added all the required DLL and OCX files to your project you need to record registry scripts for each DLL and OCX file that is a COM control. All OCX files should be COM controls, but not all DLLs are COM controls. You can simply select all DLL & OCX files, right click, and select "Record registry script now". Thinstall will skip any DLL files that are not COM controls. See this page for more information about recording registry scripts.