Customize the Main Toolbar
| Previous Microplanet Gravity Next |
Gravity has one main toolbar. If you add enough buttons, and the bar is docked, the extra buttons will disappear off the right hand side. If the bar is not docked, you can display all buttons. To customize the toolbar, go to:
View - Customize Toolbar ...
Shortcut: Right-Click anywhere on the toolbar and select customize.
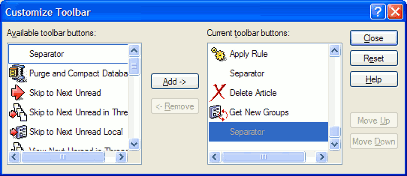
The dialog should be self explanatory - pick a button from the left pane and Add it to the right pane. Move it up or down to the desired position. You can also add separators to create button groups.
Position the toolbar
You can move the toolbar from the default location by dragging it with the mouse.
 Place the mouse cursor on the dotted left edge of the toolbar and drag it while holding down the left mouse button.
You can drag it to the bottom and attach or "dock" it above the status bar, or drag it to the sides (it will not dock on the sides). To dock it to the top or bottom, hold the bar over the location until the shape changes.
You can drag it completely off the main Gravity window, if you have a wide screen.
In a floating state, you can re-size and reshape the toolbar by dragging an edge when the mouse cursor changes to arrows near an edge.
Note: Be a little careful where you drop the floating toolbar. If the top disappears off screen, you might not be able to find the top edge to move it. This may happen when you make the bar narrow when the top edge is near the screen edge. In that case, first try to drag a side edge wider so that the toolbar resizes as wide (not tall) as possible.