Manual LVM Partitioning
The following section explains how to manually configure LVM for Community Enterprise Linux. Because there are numerous ways to manually configure a system with LVM, the following example is similar to the default configuration done in "Automatic Partitioning".
On the Disk Partitioning Setup screen, select Create custom layout from the pulldown list and click the Next button in the bottom right corner of the screen.
In a typical situation, the disk drives are new, or formatted clean. The following figure, Figure 10.4, "Two Blank Drives, Ready for Configuration", shows both drives as raw devices with no partitioning configured.
Two Blank Drives, Ready for Configuration The Refer to Figure 10.5, "Creation of the Boot Partition" to verify your inputted values:
Creation of the Boot Partition Click OK to return to the main screen. The following figure displays the boot partition correctly set:
The Once the boot partition is created, the remainder of all disk space can be allocated to LVM partitions. The first step in creating a successful LVM implementation is the creation of the physical volume(s).
Creating a Physical Volume Repeat these steps to create as many physical volumes as needed for your LVM setup. For example, if you want the volume group to span over more than one drive, create a physical volume on each of the drives. The following figure shows both drives completed after the repeated process:
Two Physical Volumes Created, Ready for Volume Groups Once all the physical volumes are created, the volume groups can be created:
There is overhead disk space reserved in the volume group. The volume group size is slightly less than the total of physical volume sizes.
Creating an LVM Volume Group Create logical volumes with mount points such as Creating a Logical Volume Repeat these steps for each volume group you want to create.
You may want to leave some free space in the volume group so you can expand the logical volumes later. The default automatic configuration does not do this, but this manual configuration example does - approximately 1 GB is left as free space for future expansion.
Pending Logical Volumes Click OK to apply the volume group and all associated logical volumes.
The following figure shows the final manual configuration:
Final Manual ConfigurationCreating the
/boot Partition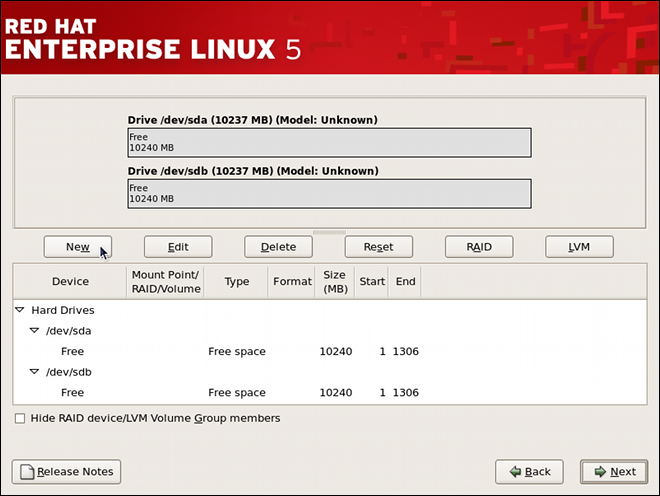
Figure 10.4. Two Blank Drives, Ready for Configuration
/boot partition cannot reside on an LVM volume because the GRUB boot loader cannot read it.

Figure 10.5. Creation of the Boot Partition
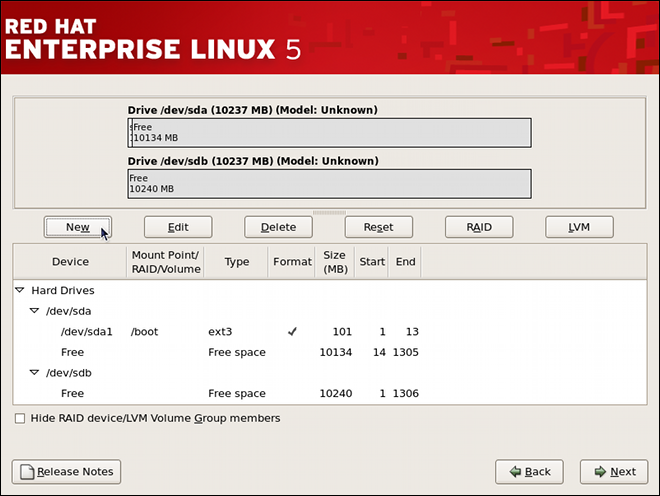
/boot Partition DisplayedFigure 10.6. The
/boot Partition DisplayedCreating the LVM Physical Volumes
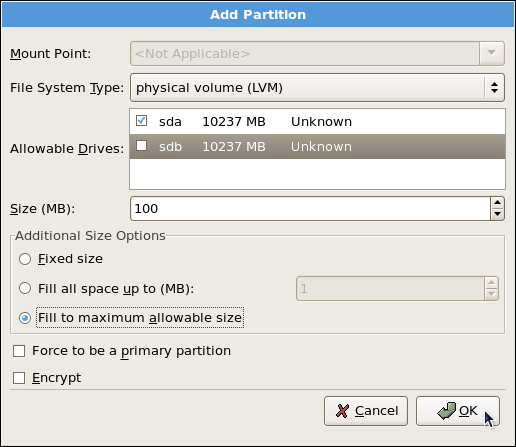
Figure 10.7. Creating a Physical Volume
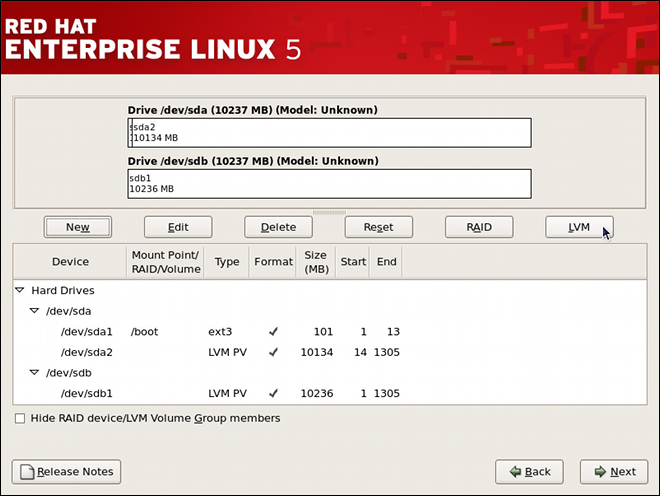
Figure 10.8. Two Physical Volumes Created
Creating the LVM Volume Groups
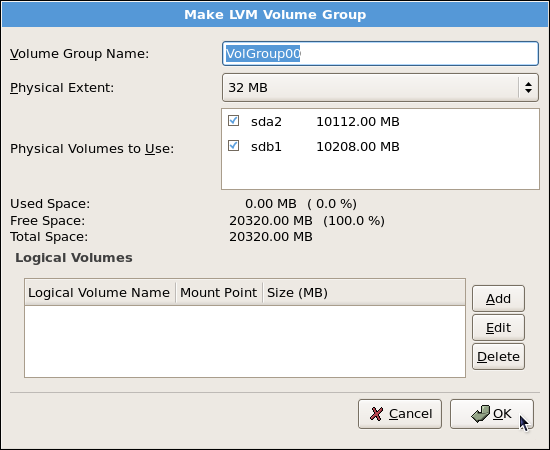
Figure 10.9. Creating an LVM Volume Group
Creating the LVM Logical Volumes
/, /home, and swap space. Remember that /boot cannot be a logical volume. To add a logical volume, click the Add button in the Logical Volumes section. A dialog window as shown in Figure 10.10, "Creating a Logical Volume" appears.

Figure 10.10. Creating a Logical Volume
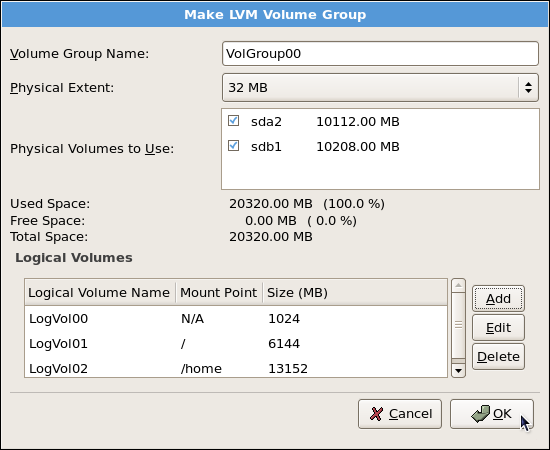
Figure 10.11. Pending Logical Volumes
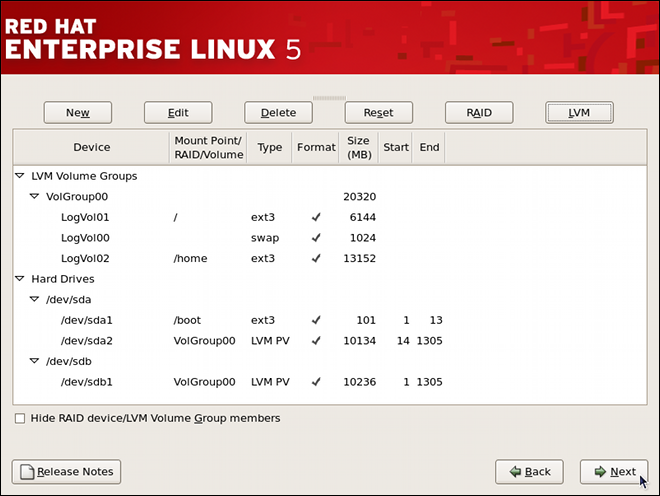
Figure 10.12. Final Manual Configuration