Place and compose an image in each frame
Now that you created six frames, you want to import the files you processed earlier into each of the frames. Once imported, you can easily compose each image by dragging it around the canvas. Using frames to store and manipulate the images also allows you to export them all at once with the file settings you want.
- In the Frames panel, select the first frame.
- Select File > Import and browse to the following folder on your hard disk:
local_sites/cafe_townsend/fireworks_assets/camera_files
- Select dish_1013.jpg and click Open.
- Align the insertion pointer just outside the upper-left corner of the canvas as shown in the following illustration, and then click to insert the image.

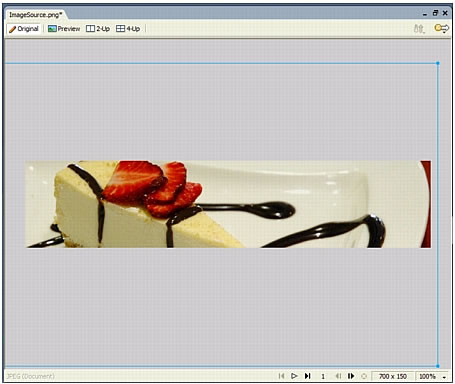
The image appears, selected, on the canvas.
The image is larger than the canvas, as indicated by its blue outline. Instead of cropping the image, you'll move it until the part of the image you want appears in the "window" created by the canvas. When you export the image later in the tutorial, it'll be cropped so that its height and width match the canvas size (700 x 150 pixels).
- To compose the image, drag it until the part you want appears in the window created by the canvas.
- Click anywhere outside the selected image to deselect it.
- Repeat steps 1 through 6 for the remaining five images, making sure to select a new, empty frame before importing each image.
- Save your work.

