Export the document to HTML format
Your document is now ready for export.
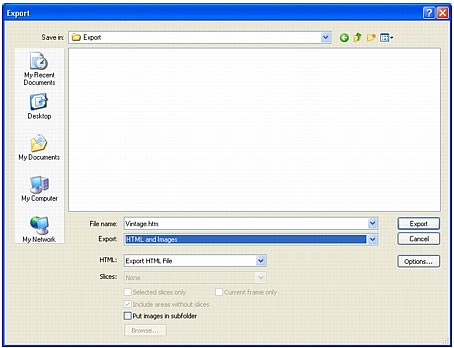
- Select File > Export.
- In the Export dialog box, browse to the following folder on your hard disk:
local_sites/global/
- Ensure that HTML and Images is selected in the Export pop-up menu, and enter index.htm as the filename. Naming the home page index.htm is a common convention used on the web. Many browsers will even automatically display the index.htm page when a URL lists a location but not a page name.
Additionally, earlier in the tutorial you assigned the Home button a URL of index.htm. Currently there is only a single page on the Global website, so linking this page to itself may not make much sense at this point. But if you create other pages for this site in the future, you can use the navigation bar on all the pages, providing users with a consistent navigation method.
- Ensure that Export HTML File is selected in the HTML pop-up menu and Export Slices is selected in the Slices pop-up menu.
- Select the following options, leaving all the others deselected:
- Include Areas Without Slices
- Put Images in Subfolder
When you select Put Images in Subfolder, Fireworks allows you to choose a folder in which to store your exported graphic files. Fireworks creates the folder for you if it doesn't exist. If you don't choose a folder, Fireworks chooses a folder named images by default. For this tutorial, accept the default setting.
- Click Export.
The files are exported to the location you specified.
- Select File > Save to save your source PNG file.

