Creating hotspots
After you identify areas on a source graphic that would make good navigation points, you create the hotspots and then assign URL links, pop-up menus, status bar messages, and alt text to them. There are two ways to create hotspots:
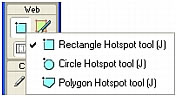
- You can draw the hotspot around a target area in the graphic using the Rectangle, Circle, or Polygon (odd-shaped) Hotspot tools.
- You can select an object and insert the hotspot over it.
A hotspot need not always be a rectangle or a circle. You can also create polygon hotspots composed of many points. This can be a good approach when working with intricate images.
To create a rectangular or circular hotspot:
- Select the Rectangle Hotspot or Circle Hotspot tool from the Web section of the Tools panel.
- Drag the hotspot tool to draw a hotspot over an area of the graphic. Hold down Alt (Windows) or Option (Macintosh) to draw from a center point.
NOTE
You can adjust the position of a hotspot as you drag to draw it. While holding down the mouse button, simply press and hold down the Spacebar, then drag the hotspot to another location on the canvas. Release the Spacebar to continue drawing the hotspot.
To create an odd-shaped hotspot:
 Select the Polygon Hotspot tool.
- Click to place vector points, much as you would draw straight line segments with the Pen tool. Whether the path is open or closed, the fill defines the hotspot area.
To create a hotspot by tracing one or more selected objects:
- Select Edit > Insert > Hotspot.
If you selected more than one object, a message appears asking whether you want to create a single rectangular hotspot covering all objects or multiple hotspots, one for each object.
- Click Single or Multiple. The Web Layer displays the new hotspot or hotspots.

