The Progress Window settings on this dialog let you configure the small popup "Loading"
message that appears while the application is extracting the project data onto the local hard drive. For example, you could change the message from "Loading" to "Please wait..." or make it so it doesn't appear at all.
The "Encrypt data segment" option tells AutoPlay to encrypt all of the project data that it stores in the compressed executable. This adds a small layer of security to the application, so that users can't extract the project files directly from the executable using an external zip utility like
WinZip.
4 ) C li ck B uild a nd w a i t f o r t h e build p r o ce ss t o e nd.
AutoPlay will build the project and inform you when your application is ready. This build process is almost as fast as the hard drive folder option, so you shouldn't have to wait too long.
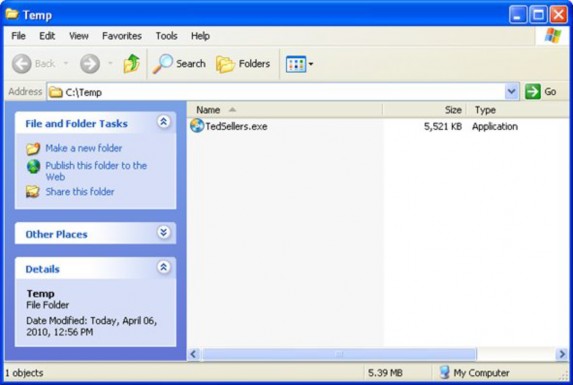
5 ) C li ck C lo s e t o ex i t t h e P ubli s h wi z ar d. Wh e n t h e C : \T em p f old er op e n s , doubl e - c li ck on t h e T e d S e ll er s . exe f il e t o l a un c h y ou r
a ppli ca t ion.
When you close the Publish wizard, AutoPlay will automatically open the C:\Temp folder for you. Inside that folder, you should see an executable file called TedSellers.exe.
The entire application is contained within that file. When you double-click on it, the "Loading" message will appear as the contents are automatically extracted to a temporary folder on the hard drive, and then the application will run the same as before.
Note: When you build a compressed executable, there is only one file to distribute.
![]()
6 ) E x i t f r o m t h e a ppli ca t ion a nd re t u r n t o A u t o P l ay M e di a St udio.
Once you've had a chance to try your application out, close the application and return to the AutoPlay design environment.

Note: A little bit of magic happens behind the scenes after you click the Exit button. As your application exits, it removes the files that it extracted to the temporary folder when you launched it. You don't have to worry about the files being left "exposed" in the user's temp folder, or about taking up space on the user's hard drive. Like any well-behaved program, your AutoPlay application cleans up after itself.
Burning a CD, DVD or Blu-Ray
With its built-in burning engine, AutoPlay Media Studio makes publishing your project to a CD- R, CD-RW, DVD±R, DVD±RW, or BD-R/RE a piece of cake.
For this exercise, I'll describe the steps for burning a compact disc, so you don't have to keep reading "CD-R, CD-RW, DVD±R, DVD±RW or BD-R/RE" over and over. But the same principles apply for burning to DVD±R, DVD±RW and BD-R/RE.
![]()
Note: You will need a CD-R or CD-RW drive and a blank CD-R or CD-RW disc in order to complete this exercise.

1 ) I n s er t a bl a n k rec o r d a bl e CD o r CD - R W in t o y ou r CD w r i t er , a nd p re ss F 7 t o op e n t h e P ubli s h wi z ar d.
Pressing F7 opens the Publish wizard, just like choosing Publish > Build from the program menu.
Note: We recommend using a CD-RW disc so you can reuse it afterwards.
![]()
2 ) S e l ec t t h e ' B u r n d a t a CD / D V D / B lu - Ray " op t ion, a nd c li ck Nex t .
This time, you're going to burn the project to a recordable CD.
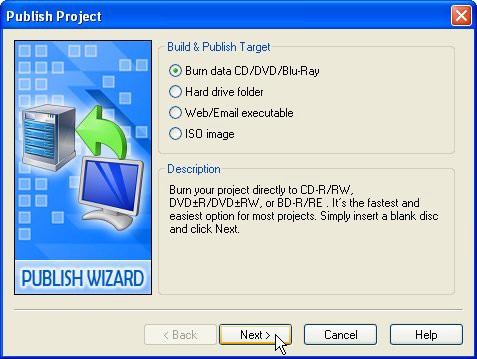
Clicking Next will bring you to the second page of the wizard where you can specify the burn options.
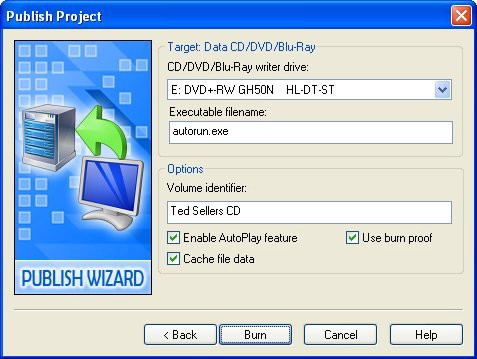
3 ) S e l ec t y ou r CD w r i t er d r i ve f r o m t h e d r op - down li s t , a nd c h a ng e t h e v olu me id e n t i f i er t o s o me t hing a pp r op r i a t e , li ke T e d S e ll er s CD .
The "CD/DVD/Blu-Ray writer drive" drop-down list is provided in case you have multiple CD/DVD/Blu-Ray drives in your system. Select the drive that you will be using to burn the CD.
The "Volume identifier" field lets you specify the name of the CD as it will appear in the My Computer folder in Windows.
4 ) C li ck B u r n a nd w a i t f o r t h e bu r n p r o ce ss t o e nd.
If you're using a CD-RW disc, a warning dialog will appear to ask if you're sure you want to do so. You aren't burning a "master" disc to send to a duplication service, so just click Yes.
If the CD-RW isn't empty, another dialog will appear asking if you want to erase the disc. If you're sure that there isn't anything on this disc that you wanted to keep, then click OK and AutoPlay will erase the disc for you before burning the project. (If you put the wrong disc in by mistake, just eject it and replace it with a blank one.)
Once the burn is completed, the drive should automatically eject the CD.
5 ) C li ck C lo s e t o ex i t t h e P ubli s h wi z ar d. C lo s e t h e CD t ray t o re in s er t t h e di s c b ack in t h e d r i ve .
After you insert the CD in the drive, you should hear it spin up as the drive begins to read the contents. The drive will look in the root folder of the CD for a file named autorun.inf which tells it the name of a program to load when the CD is inserted.
![]()
Note: AutoPlay automatically creates the autorun.inf file for you when the "Enable AutoPlay feature" option is turned on.