Now that we have everything set up the way we want, let's see some scrolling text in action.
1 ) S ave t h e p r oj ec t .
It's always a good idea to save the project before you preview it.
2 ) P rev i e w t h e p r oj ec t . Wh e n t h e p rev i e w a ppli ca t ion op e n s , c li ck on t h e A bou t T e d S e ll er s bu tt on t o go t o t h e A bou t T e d p a g e . T ry
s cr olling t h e t ex t in t h e p ara g ra ph obj ec t up a nd down.
Pretty cool, isn't it!
3 ) E x i t t h e p rev i e w.
That's it for this lesson.
In this lesson, you learned how to:
• Add a panel image to serve as a backdrop and border for some text
• Add a scrollable paragraph object
• Replace the text in a paragraph object by shift-dragging a text file
• Use a custom scroll bar style
L ess o n 7 : V i d e o
If a picture's worth a thousand words, how many words is a video worth?
In this lesson, I'll show you how to add a video to your project, cover some of the basic video settings, and teach you how to control a video using a handful of simple actions.
What You'll Learn
In this lesson, you'll learn how to:
• Add a panel image to frame a video
• Add an attractive text banner to the page
• Add a video object
• Customize the video object's built-in control panel
• Make your own video controls from scratch
• Control the video with a few simple actions
How Long Will It Take?
This lesson takes approximately 25 minutes to do.
If you're continuing from Lesson 6, you should still have AutoPlay running with the Tutorial project open. If so, you're ready to move on to the next exercise: Adding a Text Banner.
Otherwise, you'll need to open the project file that you saved at the end of Lesson 6.
1 ) Op e n t h e Tu t o r i a l. a u t opl ay f il e t h a t y ou s ave d in L e ss on 6 .
When you save a project, AutoPlay automatically creates a project folder for it inside your "My Documents\AutoPlay Media Studio 8\Projects" folder. This project folder is where everything that belongs to the project is stored-including the project file, which contains all of the settings used in the project.
The project folder and the project file always have the same name that you gave to the project when it was created. The project file's name ends with a ".autoplay" file extension.
Since you named this project "Tutorial" in Lesson 1, the name of the project folder will be Tutorial, and the name of the project file will be Tutorial.autoplay. So, the path to the project file should be something like:
...\My Documents\AutoPlay Media Studio 8\Projects\Tutorial\Tutorial.autoplay To open the project, you just need to open that project file.
Adding a Panel Image
As you saw in the previous lesson, a panel image is just an image object that you put behind another object to achieve some kind of custom background or picture frame effect. Let's use another panel image to provide a "frame" for our video object.
1 ) S wi t c h t o t h e V id e o p a g e .
First things first. We're going to add this panel image to the Video page, so click on the "Video" page tab at the top of the work area.
2 ) C li ck t h e I ma g e s bu tt on on t h e G a ll ery p a n e .
Clicking the Images button at the top of the Gallery pane displays the collection of images the gallery.
Since you used the Gallery pane to add an image from the Panels folder in the previous lesson, the Images section of the Gallery pane should already be displaying the contents of the Panels folder.
3 ) S e l ec t t h e P a n e l - 027 .png f il e a nd d ra g i t on t o t h e p a g e .
The Panel-027.png file is similar to the Panel-026.png panel image that we used in Lesson 6, but its frame is designed to fit around a standard 320x240 video.
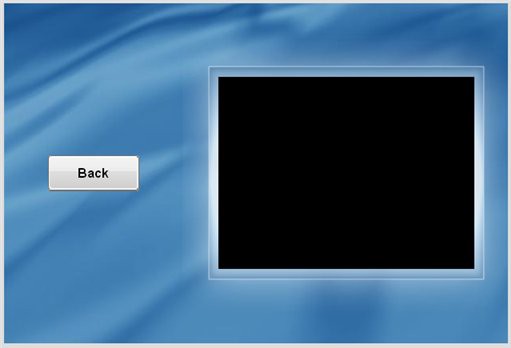
4 ) U s e t h e a lign me n t t ool s t o ce n t er t h e i ma g e obj ec t ver t i ca ll y on t h e p a g e a nd a lign i t wi t h t h e r igh t e dg e o f t h e p a g e .
Make sure Align to Page/Dialog mode is on. (An easy way to do this is to right-click on the image, and choose Align. If Align to Page/Dialog mode is on, the To Page/Dialog item will have a box around it.)
Then, right-click on the object and choose Align > Center Vertical. Finally, right-click on the object and choose Align > Right.
Voila! The image is now positioned perfectly on the right side of the page.
5 ) R igh t- c li ck on t h e i ma g e obj ec t a nd c hoo s e P in.
Pinning the image object will make it easier to work "around" the object without moving it by accident.
Tip: You can also pin an object by selecting it and pressing Ctrl+P.
![]()
Adding a Text Banner
The video we're going to add is a short presentation about a new home design called the "Magnolia." To help introduce the video, let's place an attractive text banner across the top of the page.
In order to make the text stand out, we'll use a paragraph object with white text on a blue background.
1 ) R igh t- c li ck on t h e p a g e s u r f ace a nd c hoo s e P ara g ra ph.
Make sure you right-click on the actual page surface, and not on part of the panel image. (If you select the panel image by mistake, try right-clicking further to the left.)
Choosing Paragraph from the right-click menu will add a paragraph object to the page.
2 ) D oubl e - c li ck on t h e n e w p ara g ra ph obj ec t t o op e n t h e P ara g ra ph P r op er t i e s di a log. C h a ng e t h e obj ec t ' s t ex t t o M a gnoli a .
When you double-click a paragraph object, all of the text in the Text setting is automatically highlighted for you, so you should be able to just type the text right in.
![]()
Note: You want this text to replace the existing default text, so make sure the old text is highlighted before you type the new text in.
3 ) S e t t h e N o rma l c olo r t o whi t e , a nd c li ck t h e M a t c h N o rma l bu tt on.
We want the paragraph object to have white text, and we don't want the object to appear interactive, so we need to make sure the Highlight and Click colors both match the Normal color.

4 ) C li ck O K t o c lo s e t h e P ara g ra ph P r op er t i e s di a log.
When you click OK, the Paragraph Properties dialog closes and the new paragraph object appears where you right-clicked on the page.
5 ) I n t h e p r op er t i e s p a n e , c h a ng e t h e A lign me n t s e tt ing f r o m " L e ft" t o " Ce n t er . "
A quick way to change this setting is to double-click it.
Double-clicking the Alignment setting advances it to the next item in its list.
Since paragraph objects start out with their Alignment set to "Left" by default, double-clicking on the Alignment setting switches it to "Center." (If you double-clicked again, it would change from "Center" to "Right.")
This is a quick way to change settings that give you two or three options to choose from.
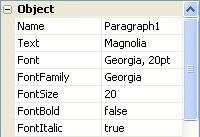
6 ) C h a ng e t h e Fon t F am il y t o G e o r gi a , Fon tS i z e t o 20 , a nd Fon t I t a li c t o "t r u e . " L eave Fon t B old s e t t o "f a l s e . "
We want the paragraph object to use an italicized, unbolded, 20-point Georgia font.
7 ) S e t B o r d er St y l e t o " S olid " a nd Back g r ound St y l e t o " S olid. " L eave t h e B o r d erC olo r bl ack ( #000000 ) , a nd s e t Back g r ound C olo r t o
#5987C0 .
In order to see the object's background color, you need to set its BackgroundStyle setting to "Solid." Setting BorderStyle to "Solid" adds a thin black border around the object.
Note: The border color is already set to black so it doesn't need to be changed.
![]()