· Match the width and height of several objects at once
· Change the appearance of the button text
· Duplicate multiple objects
· Add simple actions like Application.Exit and File.Open
· Add a blank page to the project
· Duplicate an existing page
· Add navigation buttons using Page.Jump actions
· Copy objects from one page to another
· Send email with a Quick Action
L ess o n 5 : S t a t u s T ex t
Status text is text that appears when you move the mouse over an object, and then disappears when you move the mouse off of the object. It's a nice way to add a bit more description or instruction to interactive objects.
What You'll Learn
In this lesson, you'll learn how to:
• Add a paragraph object
• Turn off the paragraph object's vertical scroll bar
• Add actions to make the text dynamic, so it changes in response to events
• Add actions to the page's On Show and On Preload events
• Move an action from one event to another
How Long Will It Take?
This lesson takes approximately 20 minutes to do.
If you're continuing from Lesson 4, you should still have AutoPlay running with the Tutorial project open. If so, you're ready to move on to the next exercise: Adding a Paragraph Object.
Otherwise, you'll need to open the project file that you saved at the end of Lesson 4.
1 ) Op e n t h e Tu t o r i a l. a u t opl ay f il e t h a t y ou s ave d in L e ss on 4 .
When you save a project, AutoPlay automatically creates a project folder for it inside your "My Documents\AutoPlay Media Studio 8\Projects" folder. This project folder is where everything that belongs to the project is stored-including the project file, which contains all of the settings used in the project.
The project folder and the project file always have the same name that you gave to the project when it was created. The project file's name ends with a ".autoplay" file extension.
Since you named this project "Tutorial" in Lesson 1, the name of the project folder will be Tutorial, and the name of the project file will be Tutorial.autoplay. So, the path to the project file should be something like:
...\My Documents\AutoPlay Media Studio 8\Projects\Tutorial\Tutorial.autoplay To open the project, you just need to open that project file.
Adding a Paragraph Object
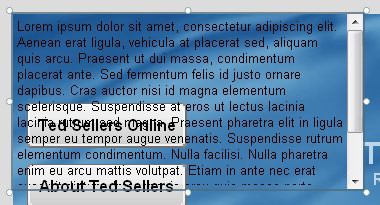
Paragraph objects are similar to label objects, but they have a few important differences:
• The font size doesn't change when you resize the bounding box...instead, the bounding box determines the area that the text can be displayed in.
• The object's dimensions stay the same even if you change the text with an action at run time.
• You can set a background color for the object.
• You can put a border around the object.
• You can display scrolling text in it, complete with scroll bars.
Paragraph objects are ideally suited for displaying status text. They allow you to specify an area that the text will appear in, and guarantee that the text will never extend beyond it. And, because the bounding box remains constant, you can center the text horizontally within the area, and the center point won' shift when the text changes.
![]()
Tip: As you'll see in Lesson 6, the paragraph object's optional scroll bars make it perfect for displaying lots of text, too.
1 ) C hoo s e Obj ec t > P ara g ra ph a nd c li ck O K .
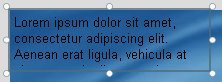
The new paragraph object appears in the upper left corner of the page. Note the default text , which serves as a reminder that paragraph objects are made for presenting long passages of text.
![]()
Tip: You can also add a paragraph object by right-clicking on the page surface and choosing Paragraph from the right-click menu.
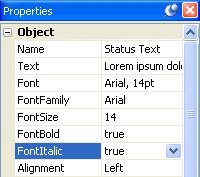
2 ) I n t h e p r op er t i e s p a n e , c h a ng e t h e obj ec t ' s n ame t o St a t u s T ex t .
This object is going to be the target of some Paragraph.SetText actions, so we might as well give the object a more meaningful name. Since it's going to be displaying status text, we might as well call it that. (If we were going to have more than one object with status text on the screen, we would need to be even more descriptive in the name, like "Status Text Top" or "Navigation Status" or something. But we're only going to need one status text display, so we can get away with calling it "Status Text.")
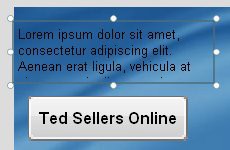
3 ) Dra g on e o f t h e re s i z e h a ndl e s t o make t h e obj ec t bigg er .
When you make the object's bounding box bigger, the text reflows to take advantage of the new space. Note that the text wraps around when it reaches the edge of the bounding box, just like a paragraph. (That's why it's called a paragraph object.)
Unlike a label object, when you resize a paragraph object, the text size doesn't change. Only the size of the bounding box changes. The text just adapts to the new shape.
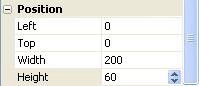
4 ) Re s i z e t h e p ara g ra ph obj ec t s o i t s wid t h i s 200 pi xe l s a nd i t s h e igh t i s 60 pi xe l s ( 200 x 60 ) .
The easiest way to resize the object to a specific size is to change the Width and Height settings in the Position category of the properties pane. In this case, just set the Width to 200, and the Height to 60.
You can also just resize the object with the mouse until you get the dimensions right, but I find doing it that way takes longer.
Notice that once again the font size doesn't change when you make the paragraph object smaller; only the bounding box gets smaller.
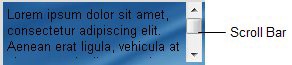
Since the bounding box is now too small for all of the text to fit, a scroll bar appears on the right side of the paragraph object. (It wasn't there before, because the object's vertical scroll bar is set to Auto. When it's set to Auto, the scroll bar only appears if there isn't enough room in the object for all of the text.)
5 ) I n t h e S cr ollb ar s ca t e go ry o f t h e p r op er t i e s p a n e , c h a ng e t h e V er t i ca l s e tt ing f r o m " A u t o " t o " O ff . "
The Vertical setting controls the vertical scroll bar.
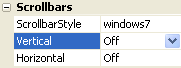
When you turn off the vertical scroll bar, the text is essentially "chopped off" at the bottom edge of the paragraph object's bounding box. (The object is sized too small to fit all of the text, so it just displays as much of the text as it can.)
6 ) S e t t h e obj ec t ' s Top t o 15 .
Select the paragraph object by itself, and set its Top setting (in the Position category) to 15.
7 ) S e t t h e obj ec t ' s f on t t o 14 poin t Ar i a l, bold a nd i t a li c .
An easy way to do this is to change the FontSize to 14, and then double-click on FontBold and FontItalic to set them both to true.
Note that the bounding box stays the same size when you change the paragraph object's font size. (If this were a label object, the bounding box would have grown to accommodate the larger text.)
8 ) C h a ng e t h e obj ec t ' s a lign me n t t o " Ce n t er . "
Now each line is centered horizontally inside the bounding box.

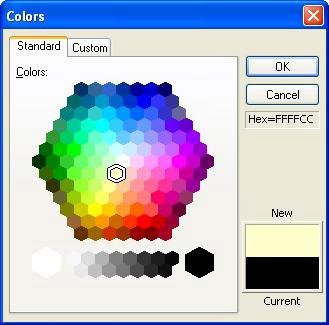
9 ) S e t t h e N o rma l, D own a nd H ighligh t c olo r s t o # FFFF CC .
We don't want the text to change color on mouse-overs and clicks, so the Normal, Down and Highlight colors need to be the same.
There are two really quick ways to change the colors to #FFFFCC: you can double-click on the object, set the Normal color using the Standard tab of the Colors dialog, and then click Match Normal; or, you can type the hexadecimal into the properties pane, copy it into the clipboard, and paste it into the other two color settings.
For the first method, you double-click on the object, click on the Normal color chooser, click on More Colors, and select the color immediately down and to the left from the center. Click OK to close the Colors dialog, then click Match Normal, and click OK to close the Paragraph Properties dialog.
For the second method, you double-click on the Normal color setting in the properties pane to highlight the hexadecimal text. Then type in #ffffcc, double-click on the text that you just entered, and press Ctrl+C to copy it into the clipboard. Then double-click on the Highlight color value, and press Ctrl+V to paste the text that you copied. Do the same for the Click color, and then press Enter (or just click on another setting), and you're done.
![]()
Tip: Both of these methods are a lot easier to do than they are to describe. If they sound kind of complicated, they really aren't. Changing colors like this is something you'll do pretty often, so it pays to learn faster ways to do it. Try each method out and see which one you like best.
Making the Text Dynamic
Now for the fun part. We're going to make the text in our paragraph object change as the mouse moves over the interactive objects on the page. To do this, we'll give those objects On Enter and On Leave actions. (Which is another way of saying that we'll add some actions to their On Enter and On Leave events.)
1 ) C li ck on t h e p ara g ra ph obj ec t a nd doubl e - c li ck on t h e l e ft c olu m n o f t h e T ex t f i e ld in t h e P r op er t i e s p a n e . P re ss t h e De l e t e key t o era s e t h e t ex t , t h e n p re ss E n t er t o acce p t t h e c h a ng e .
We want the paragraph object to start out empty when you first launch the application. The easiest way to do this is to just delete the text from the paragraph object, so that it is empty to begin with.
A quick way to highlight all of the text in a setting on the properties pane is to double-click on the name of the setting, in the left column of the properties pane. When you double-click on the name of a setting, all of the text in the setting is selected.

Once you have the text selected, pressing the Delete key deletes it. Pressing Enter makes the change permanent.
![]()
Tip: If you edit the text in a field by mistake, and you haven't pressed Enter yet (or deselected the setting by clicking somewhere else), you can cancel the change by pressing Esc.