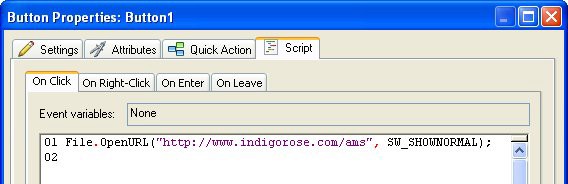
Once you've set the actions parameters, click Finish to close the New Action wizard. The File.OpenURL action will appear in the list on the script editor. Note that the parameters you
provided are listed between parentheses after the actions name, in the same order they appeared in on the New Action wizard, separated by a comma.
Finally, click OK to close the script editor.
9 ) C hoo s e P ubli s h > P rev i e w. Wh e n t h e a ppli ca t ion op e n s , c li ck on t h e T e d S e ll er s Onlin e bu tt on t o op e n t h e UR L y ou s p ec i f i e d in s t e p 8 . Wh e n y ou ' re don e b r ow s ing t h a t w e b s i t e , c lo s e t h e w e b b r ow s er , a nd t h e n c li ck on t h e E x i t bu tt on obj ec t t o c lo s e t h e a ppli ca t ion.
The File.OpenURL action opens whatever URL that you specify in the program that is registered as the default web browser on the users system. In most cases, this will be some version of Internet Explorer or Mozilla Firefox, but it could also be Netscape Communicator, or even Opera. The important thing is that it will open the website in the web browser that the user is familiar with.
Note that the preview application remains running in the background while you browse the website. The File.OpenURL action is an excellent way to let someone visit a web page without losing their place in your application.
Adding Pages
The other two buttons are going to jump to other pages in the application, so lets start off by adding those pages.
1 ) C hoo s e P a g e > A dd t o a dd a n e w bl a n k p a g e .
When you choose Page > Add, a new page is added to the project.
You can see that a new page has been added by looking at the top of the work area, where a second page tab has appeared.
![]()
When you add a new page, it is automatically selected, so the new pages name also appears in the properties pane. This new pages name is Page 2. (The first page was named Page1, and the new page gets the next available number.)
2 ) I n t h e p r op er t i e s p a n e , c h a ng e t hi s p a g e ' s n ame t o A bou t T e d.
To change the page name, just highlight the text in the Name setting and type in the new text.
![]()
(Remember to press Enter when you're done to confirm the change to the Name setting.) When you edit the Name setting, the name of the page also changes on the page tab.
![]()
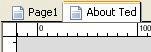
Tip: You can click on the page tabs to switch between pages.
3 ) On t h e P r oj ec t p a n e , n av ig a t e t o t h e I ma g e s f old er , a nd lo ca t e t h e f il e n ame d 630B1151 .jpg. Dra g t hi s i ma g e f il e on t o t h e p a g e s u r f ace . Wh e n a s ke d i f y ou w a n t t o s e t t hi s i ma g e a s y ou r p a g e b ack g r ound, c li ck Y e s .
If you remember from Lesson 2, whenever you add an image to your project, a copy of the image file is kept in the projects Images folder. You can access these cached images by using the Project pane.
Since the Project pane remembers where it was the last time you used it, it should still be in the Buttons folder. (We navigated to the Buttons folder earlier in this lesson.) You'll need to navigate out of that folder, and then navigate into the Images folder.
Remember that you can navigate out of a folder by double-clicking on the special up folder (the one with two dots next to it). This moves you up one level in the folder hierarchy.
Once you're in the Images folder, all of the image files that you've used in the project will be listed on the Project pane. This includes the file named 630B1151.jpg which you used for the background image on Page1. To use this image as the background image for the new About Ted page, just drag it onto the page surface. When asked if you want to set this image as your page background, click Yes.
![]()
Tip: If you don't want to be asked this question in the future, click on the Don't ask me again checkbox. If you do that, the same answer will automatically be used in the future - either Yes or No, depending on which button you click.
4 ) C hoo s e P a g e > D upli ca t e t o a dd a no t h er p a g e ju s t li ke t hi s on e .

Like duplicating objects, you can duplicate the current page. When you duplicate a page, all of its settings and objects are duplicated as well. The only thing that is different on the new page is its name.
Note: If you're wondering why the new page is called Page2, and not Page3, its because AutoPlay always gives new pages (and objects) the smallest available number when it names them. So, when you renamed Page2 to About Ted, the name Page2 became available again.
Tip: You can also duplicate a page by right-clicking on the page tab and choosing Duplicate.
5 ) I n t h e p r op er t i e s p a n e re n ame P a g e2 t o V id e o.
In the properties pane, rename Page2 to Video.
![]()
Tip: You can also change a pages name by double-clicking on the page surface and editing the Name setting on the Page Properties dialog.
Adding Navigation Buttons
Now that we have three pages in the project, we need a way for the user to go from one page to another - in other words, to navigate the application. This is incredibly easy to do: you just add a Page.Jump action to whatever event you want to use as the trigger for the change.
For this project, well use button objects to trigger the page changes - specifically, the On Click events of two buttons on Page1, and of one button each on the About Ted and Video pages.
![]()
Note: You don't need to use buttons for this...you could use label objects instead, or paragraph objects, or any combination of objects that have On Click events. For this example, though, well use buttons because they're cool.