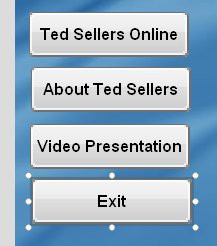
As you've probably guessed, this button will be used to exit the application.
Lining Them Up
Before we add any actions to these buttons, lets line them up nicely on the left side of the page.
1 ) M ake s u re t h e t op bu tt on ( B u tt on 1 ) i s s t ill po s i t ion e d a t 14 , 89 .
To confirm an objects position, just select it (by clicking on it) and either look at the position readout on the status bar, or look at the Left and Top settings in the Position category of the properties pane.
Note: 14, 89 is shorthand for 14 pixels from the left, and 89 pixels from the top.
![]()
2 ) M o ve t h e bo tt o m bu tt on ( B u tt on 4 ) t o 14 , 270 .
To move the Button4 button object, either drag it into place (using the position readout on the status bar as a guide), or set its Left and Top settings to 14 and 270, respectively.
3 ) S e l ec t a ll f ou r bu tt on s . R igh t- c li ck on t h e t op bu tt on obj ec t ( B u tt on 1 ) a nd c hoo s e A lign > L e ft .
Right-clicking on the top button object will make it the dominant object. When you choose Align
> Left, all four buttons are lined up with that object.
4 ) R igh t- c li ck on t h e t op bu tt on obj ec t a nd c hoo s e A lign > D i s t r ibu t e V er t i ca l.
When you choose Align > Distribute Vertical, the two middle objects will be repositioned so there is an equal distance between all four of the objects.

Adding Simple Actions
Now lets make the buttons do something.
In AutoPlay, getting an object to do something means adding an action to one of the events that the object can respond to.
Events are just things that can happen when your application is running. For example, most objects have an On Click event, which is triggered when the left mouse button is clicked on that object. To make something happen when the object is clicked, you simply add an action to its On Click event.
Actions are just commands that tell the application to do something. There are actions to do all sorts of things, like changing the text in a label object, running external program files, telling a video object to start playing, or jumping to another page.
Quick Actions are special easy-to-use actions that take care of simple tasks without any scripting. For example, most objects let you configure a single Quick Action that will be performed when the object is clicked. Adding a Quick Action is an easy way to make something happen when you click on an object.
Every object has its own events, and each event can have its own actions. The actions that you add to an objects event are only performed when that specific event is triggered - in other words, events are object specific. This means that your application can do completely different things when the user clicks on different objects. For example, you could make clicking on one object start playing an audio file, while clicking on another object makes the application jump to another page. Each click would trigger the specific objects On Click event, causing that events list of actions to be performed.
1 ) C li ck on t h e p a g e s u r f ace , t h e n c li ck on t h e E x i t bu tt on ( B u tt on 4 ) .
In order to add an action to the Exit button, you need to have that button object selected by itself. Clicking on the page surface deselects all of the objects, so you can select the Exit button object on its own.
2 ) M ake s u re t h e Ac t ion s ca t e go ry i s op e n in t h e p r op er t i e s p a n e .
The Actions category is the last category in the properties pane. When you have an object selected, all of the places where actions can be defined for the object are listed in this category.
![]()
Tip: You might need to scroll to the bottom of the properties pane in order to see all of the items in the Actions category.