To add the button to the page, just drag the 0001-windows-7.btn file from the Project pane onto the page. A new button object will be placed at the spot where you drop the file. Move the new button object to just below the first one.
Tip: You can also drag a button directly from the Preview pane.
![]()
6 ) I n t h e p r op er t i e s p a n e , s e t t hi s bu tt on s t ex t t o A bou t T e d S e ll er s .
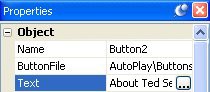
When you change the Text setting, About Ted Sellers appears on the button object. (Later on, we'll make this button jump to another page that has information about Ted on it.)
Matching the Width and Height
The new button object that you added doesn't have the same width and height as the first one. This is because the new object still has its default width and height - it hasn't been resized yet like you resized the Ted Sellers Online button.
You could resize the About Ted Sellers object the same way you resized the Ted Sellers Online button, but theres an even faster way to do it. Using the alignment tools, you can get one object (or many objects!) to match another objects width or height in no time flat.
1 ) S e l ec t bo t h bu tt on s . C li ck on t h e T e d S e ll er s Onlin e bu tt on t o make i t t h e do m in a n t obj ec t in t h e s e l ec t ion.
The first step in matching an objects width or height is to select the objects that you want sized the same, with the object that is already sized correctly as the dominant object. We want the size of the new About Ted Sellers button to match the size of the Ted Sellers Online button, so the Ted Sellers Online button needs to be the dominant object.
2 ) C hoo s e A lign > M ake S ame Wid t h.
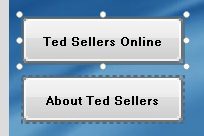
This makes the About Ted Sellers button the same width as the Ted Sellers Online button...
3 ) C hoo s e A lign > M ake S ame He igh t .
...and now the About Ted Sellers button is the same height as the Ted Sellers Online button, too.
![]()
Tip: You can also just choose Align > Make Same Size to match the width and height together in one step.
Changing Text Settings
Much like label objects, button objects give you a great deal of control over the appearance of the text that appears on them. You can change the font family and size, make the text bold or italic, and also change the color.
In fact, each button has a different text color for each state the button can assume. This allows the text color to change as the appearance of the button changes. Not only does this contribute to the
interactive appearance of the object - making the text brighten as the mouse moves over the button, for example - but it allows the text color to be adjusted to complement the changing color of the button itself. (Black text on a blue button would disappear if the buttons down appearance was also black.)
Lets change the text settings on these buttons a bit so the text will change color when the user interacts with the button.
1 ) Wi t h bo t h obj ec t s s t ill s e l ec t e d, c h a ng e t h e f on t s i z e t o 12 , a nd t h e f on t f am il y t o Ar i a l.
The default font size of 9 points is a bit small for these buttons. To change the size, change the FontSize setting from 9 to 12.
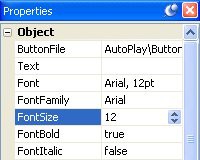
Changi ng the font si ze for both buttons at once