Choosing Align > Distribute Vertical distributes the three objects evenly between the top and bottom ones, so there is an equal distance between all three of them.
In this case, the top and bottom objects stay put, and the Phone object (the one in the middle) moves up so its placed exactly in between.
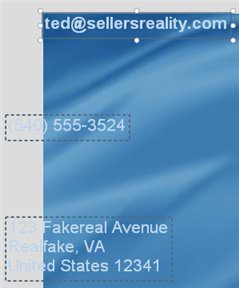
4 ) M o ve t h e bo tt o m obj ec t up s o i t s r igh t und er n ea t h t h e m iddl e on e .
In other words, move the Mailing Address label object right up under the Phone label object.
Note: You'll need to select the object on its own in order to move it.
![]()
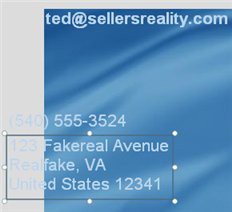
5 ) S e l ec t a ll t h ree obj ec t s a nd c hoo s e A lign > D i s t r ibu t e V er t i ca l a g a in.
Once again, the middle object moves so the selected objects are spaced evenly apart.
6 ) I n t h e p r op er t i e s p a n e , c h a ng e t h e Fon tS i z e t o 11 .
When you have multiple objects selected, you can change a setting for all of them at once just by editing it in the properties pane. Since all three of the label objects are set to use a 16-point font size, the value 16 is visible in the FontSize setting.
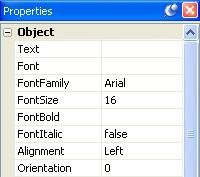
When you change this value from 16 to 11, all three label objects will switch to using an 11-point font size. (You will actually see the text in the label objects get smaller.)
![]()
Note: Any changes that you make in the properties pane are applied to all of the objects that are selected.
7 ) S e l ec t t h e E ma il A dd re ss obj ec t b y i t s e l f a nd u s e t h e p r op er t i e s p a n e t o in crea s e i t s f on t s i z e t o 13 .
We want the email address to stand out a bit from the other label objects. Making the email address a bit bigger should do the trick.
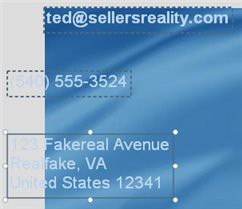
8 ) M o ve t h e t h ree l a b e l obj ec t s c lo s er t og e t h er , a nd t h e n d ra g t h em down b e low t h e logo. U s e t h e a lign me n t t ool s t o g e t t h e l a b e l obj ec t s s p ace d eve nl y a p ar t a nd a lign e d a long t h e i r l e ft s id e s .

Start off by eyeballing it, moving the objects closer together and dragging them down to the lower right side of the page, using the above image as a guide.
Once you have the objects more or less in place, select all three label objects and use Align > Left to align them along their left edges. Then use Align > Distribute Vertical to even things up.
Locking Objects
Earlier I showed you how to pin objects so they cant be moved or resized accidentally. Pinning objects prevents the objects from being moved or resized with the mouse, but still lets you access their properties and align other objects to them.
Sometimes, though, it would be nicer if the objects would just get out of the way. For example, if you have a large object on the page with other objects on top of it, or lots of objects in close proximity, it can be difficult to drag select specific objects without accidentally selecting some you don't want to. You could ctrl-click on all the objects that you want to select, one at a time, but it would be better if you could just drag select the objects you're working on and have any finished objects be ignored.
This is where locking objects comes in. When you lock an object, it becomes completely unselectable. Its like the object becomes part of the background. you can click on it or even drag- select around it, but it wont become selected at all. Its almost like it isn't there.
![]()
Note: Locking an object has no effect on how the object behaves at run time. The user will still be able to interact with the object the same way, whether its locked or not. It only affects how the object behaves while you're working on the project.