
You should now have the Label1 object selected (the one with Ted Sellers on it).
8 ) R igh t- c li ck on t h e L a b e l 1 obj ec t a nd c hoo s e Arra ng e > S e nd t o Back .
Poof! The Label1 object is sent to the back of the z-order, and disappears behind the Image2 object.
Note that the Label1 objects bounding box is still visible:
The bounding box is still visible because the Label1 object is still selected. When an object is selected, its bounding box is displayed in the foreground, on top of any objects that happen to be in the way. This gives you the same access to the object as when its on top, you can resize the label object by resizing the bounding box, or move it around by dragging it with the mouse, just like you would if it wasn't hidden.
9 ) M ake t h e L a b e l 1 obj ec t l ar g er b y re s i z ing i t s bounding bo x .
If you make the Label1 object large enough, it will become visible beyond the edge of the Image2 object.

Because the bounding box appears in the foreground, you can resize or reposition an object when its selected, even if you cant see the object itself.
10 ) C li ck on t h e I ma g e2 obj ec t , a nd c hoo s e E di t > Arra ng e > Br ing Fo r w ar d.
You have to click outside the Label1 objects bounding box in order to select the image object. Once an object is selected, clicking anywhere inside its bounding box wont deselect it, even if another object is in front.
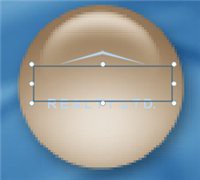
When you bring the Image2 object forward one step in the z-order, the Image1 object disappears behind it. The only object from the logo that is still visible on top of the Image2 object is the Label2 object with R E A L T Y L T D . on it.
In the project explorer, the image objects name has moved one position higher in the list.
11 ) I n t h e p r oj ec t ex plo rer , d ra g t h e I ma g e2 obj ec t a bo ve t h e L a b e l 2 obj ec t .
You can also arrange objects by dragging their names up or down in the project explorer. This is especially useful when you have many objects and you want to move one of them to a specific position in the z-order.
Tip: You can also arrange objects using four buttons on the Align toolbar.
![]()
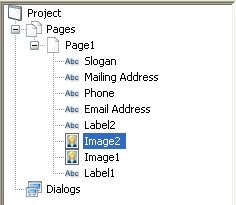
12 ) C li ck on L a b e l 1 in t h e p r oj ec t ex plo rer .
Clicking on the name of an object in the project explorer selects the object, even if theres another object in front of it.
![]()
Note: You can use the project explorer to select objects that are hidden behind other objects on the page.
13 ) D oubl e - c li ck on I ma g e2 in t h e p r oj ec t ex plo rer . On t h e S e tt ing s t a b, s e t t h e Op ac i t y t o 50 , a nd c li ck O K .
Double-clicking on an objects name in the project explorer opens the Properties dialog for that object. Its just like double-clicking on the object itself.
Changing the objects opacity from 100 to 50 makes it 50% opaque (or, conversely, 50% translucent). In other words, it makes the object partially transparent.

![]()
Tip: The Opacity setting can be used to produce all kinds of neat effects. AutoPlay even lets you change an image objects opacity dynamically at run time! (This can be done by using the Image.SetOpacity action which lets you set opacity on the fly.)
Getting Rid of Leftovers
No, this isn't an exercise in how to hide last nights overdone pot roast. Instead, its a quick mention of a very handy tool that's built into AutoPlay: the resource optimizer.
If you're anything like me, you probably have to try a bunch of different files before you find the one that fits your project. You might add one image, decide it doesn't look quite right (chartreuse is so passé this year), and then go through five or six others until you find one that you're happy with (they say orange is the new blue).
Remember how AutoPlay keeps a local cache of everything, by automatically copying any files that you use into the project folder? Well, those files are left behind even after you delete the objects that caused them to be copied in the first place. After a while, those leftover files can begin to add up.
Which isn't a problem, exactly...your project will continue to work fine, even with those extra files inside it. They'll never actually break your project. However, they do take up space...and when you're trying to fit every last bit of data onto a CD, or if you're building a single-file executable that's going to be downloaded by half a kazillion people, it can truly pay to trim off any excess fat.
The resource optimizer is an easy way to get rid of all the files that have been left behind. Its like a hypersonic push broom sweeping through your project, clearing away the debris of the design process.
Our tutorial project hasn't been around long enough to accumulate much in the way of unused resources, but we do have at least one file that we aren't using any more. Or, we will once we delete the only object that uses it.
1 ) S e l ec t t h e I ma g e2 obj ec t a nd p re ss t h e De l e t e key .
You can select the Image2 object any way you want - click on it, use the project explorer, cycle through the objects on the page by pressing Tab, etc. The important thing is to make sure its the only object that is selected, and then press the Delete key to remove it from the project. Bye-bye Image2!
2 ) C li ck on t h e P r oj ec t p a n e , a nd n av ig a t e in t o t h e I ma g e s f old er .
The Project pane should be tabbed with the Gallery and pane on the right side of the design environment. Clicking on the Project panes tab switches to that pane.
The Project pane is like a window into the project folder. Within it you'll find all of the files that have been added to your project, neatly organized into sensible categories. All of the image files that are added to the project end up in the Images folder. Once you navigate into that folder, you should see the Icon-003.png file (along with all the other image files that have been used so far).
Note that deleting the Image2 object, which was the only object in the project that used that file, didn't delete the file from the Images folder. Once a file has been added to the project, its up to you to remove it. Of course, this is where the resource optimizer comes in.
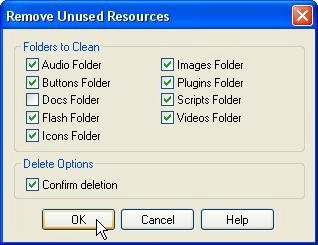
3 ) C hoo s e Tool s > Op t i m i z e Re s ou rce s . Wh e n t h e Rem o ve U nu s e d Re s ou rce s di a log a pp ear s , make s u re t h e C on f i rm d e l e t ion op t ion i s e n a bl e d. C li ck O K t o b e gin t h e op t i m i z a t ion p r o ce ss .
The Remove Unused Resources dialog lets you configure exactly which folders you want AutoPlay to search through - just in case there are some folders in the project that you don't want optimized.
![]()
Note: The Docs folder isn't searched by default, because that's where you normally put any external files that you want to distribute with your project. If you decide to optimize the Docs folder, be careful not to delete any files that you wanted to keep.