Ubuntu on Windows: Install Ubuntu on WSL2; XUbuntu Desktop + VcXsrv X-Server + PulseAudio Server
When you want to do cross-compiling, Ubuntu is more flexible than Windows 10. In fact, Windows 10 Pro supports Linux as its subsystem. So we can switch these two systems quite easily. If you don't want to alter your PC, you can rent a virtual PC on the cloud to do the same job. ✌️Most cloud providers have a *3 to 24* months *Free-trial* period to let you play happily😍 with your apps.
- Powershell
- Update to WSL - 2
- Install Ubuntu 20.04
- Continue to Update WSL-2
- Install XUbuntu Desktop(XFCE)
- Install XLaunch and PauseAudio
- Connect X Server to Xubuntu-Desktop
- Advance Bash Script
- Virtualization Disabled Bug
Powershell
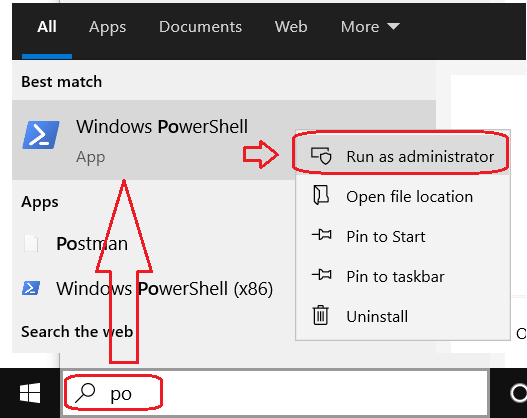
Open PowerShell as Administrator and run:
dism.exe /online /enable-feature /featurename:Microsoft-Windows-Subsystem-Linux /all /norestartRestart your PC .
Update to WSL - 2
WSL-2 has f aster performance than WSL-1, except you want to keep the function of cross-reading the documents between Windows and Linux. Furthermore, you cannot use browser in WSL-1. So let's update to WSL-2.
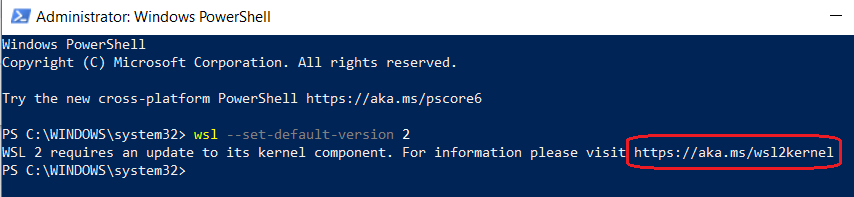
Let's set WSL-2 by open PowerShell as Administrator.
wsl --set-default-version 2It was not working and shows the help info. Then I checked OS Version.
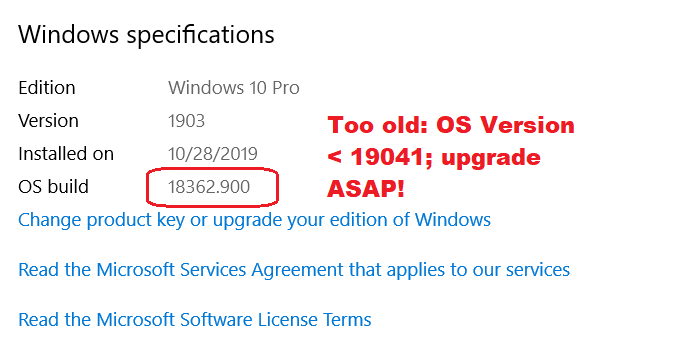
So I went to update my Windows right away.
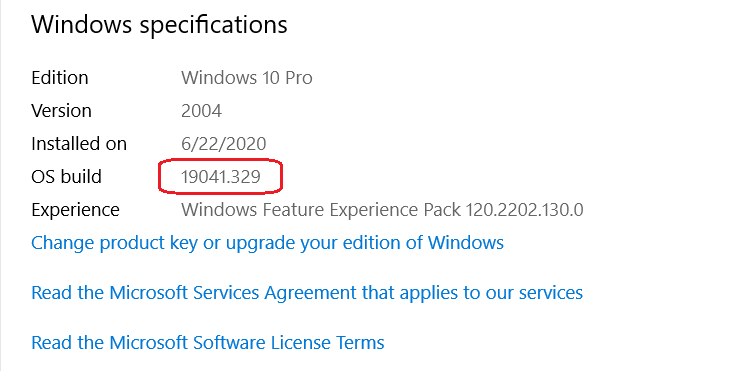
This is the right version. Let's check again.

It's WSL-1. By instruction from Microsoft, I need to turn on Virtual Machine Platform.
dism.exe /online /enable-feature /featurename:VirtualMachinePlatform /all /norestart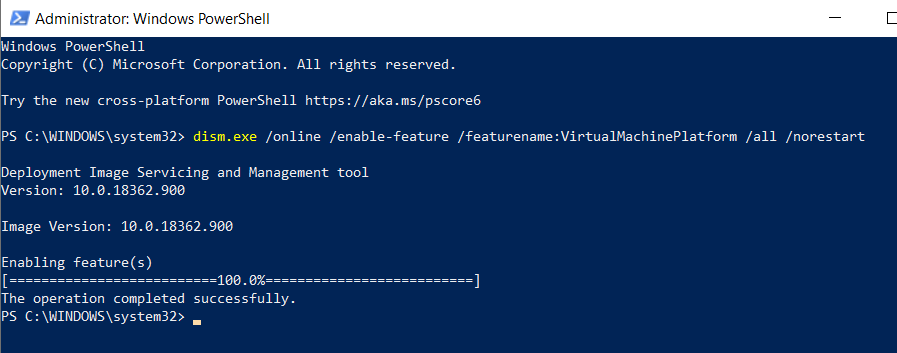
The Virtual Machine Platform has installed. Restart again…
Open PowerShell as Administrator, again.
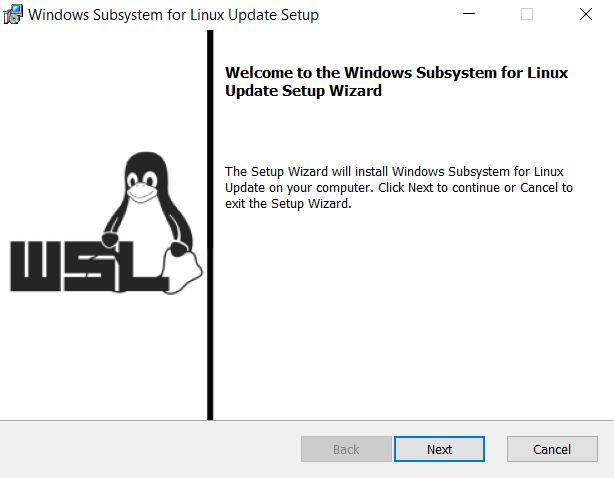
More requirement: I need to download wsl_update_x64.msi and run.
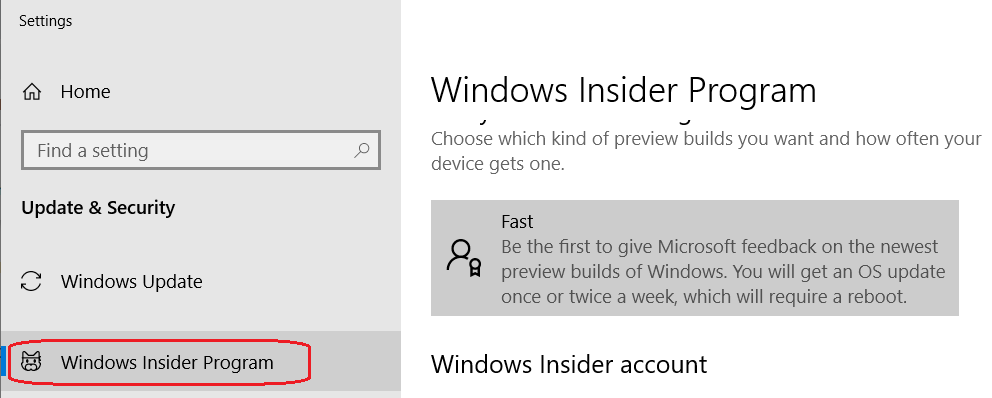
I notice that I have to become an Insider to make WSL2 work. That's hidden.
Windows Insider Program
After I register the Insider, I choose "Get Started" to link my Microsoft account.
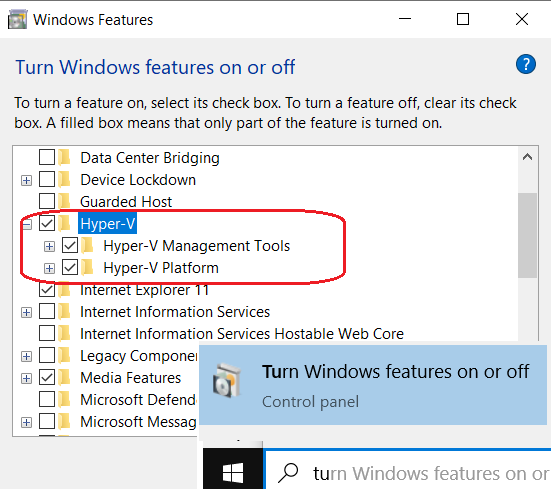
Inside the settings, I need to check features.
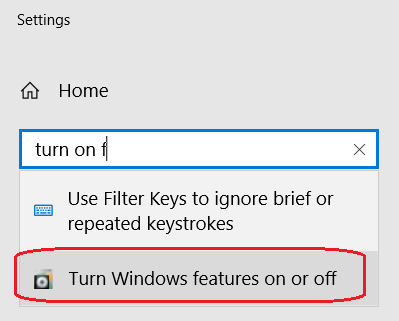
To make sure those red boxes are checked before the restart, AGAIN.

You must go to section 3 to install Ubuntu at this point.
Install Ubuntu 20.04
Please enter Microsoft Store. Now, let's search for Linux and install one of them.
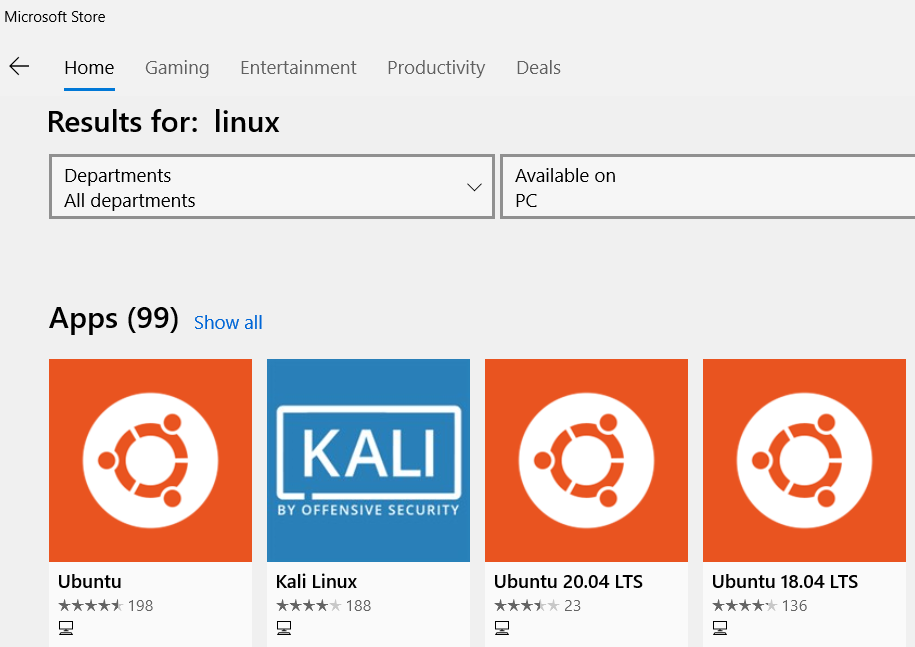
Wow, there are 99 kinds of Linux 😋. I pick Ubuntu 20.04.
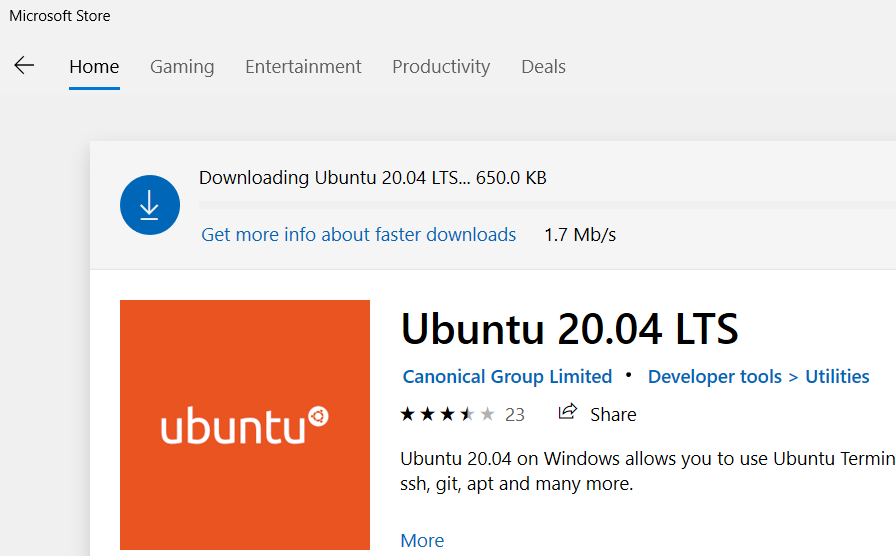
After installation, the Ubuntu will ask you about username and password. Please keep that secret information in your safe sector. You can save it to the cloud in case you forget. I prefer to save a password with another substitute, such as your luck chant, instead of a plain text. For example, it can be
*plainword+@+my lucky animal*.
Continue to Update WSL-2
🏇Open PowerShell as Administrator, again.
PS C:\WINDOWS\system32> wsl --set-version Ubuntu-20.04 2Conversion in progress, this may take a few minutes...For information on key differences with WSL 2 please visit https://aka.ms/wsl2The requested operation could not be completed due to a virtual disk system
limitation. Virtual hard disk files must be uncompressed and
unencrypted and must not be sparse.No good, it's another error. Let's unlock the settings.
PS C:\WINDOWS\system32> fsutil behavior set disableencryption 1NOTE: Changes to this setting require a reboot to take effect.
DisableEncryption = 1 (Enabled)
PS C:\WINDOWS\system32> fsutil behavior set disablecompression 1
NOTE: Changes to this setting require a reboot to take effect.
DisableCompression = 1 (Enabled)Furthermore, you need to uncompress the package.
Next,
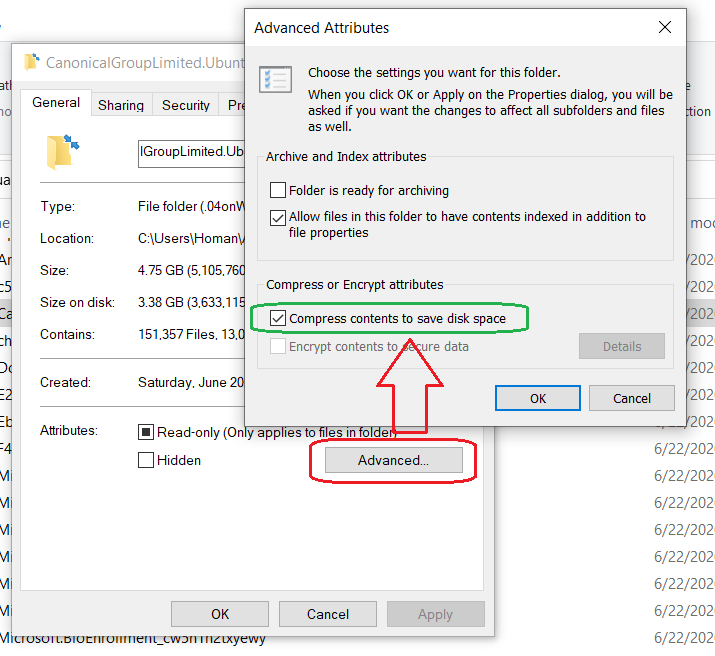
Uncheck the box of "Compress contents to save disk space", so the OS will uncompress the package. It takes a while to be done depending on your CPU speed. After that, let's run the set version again.
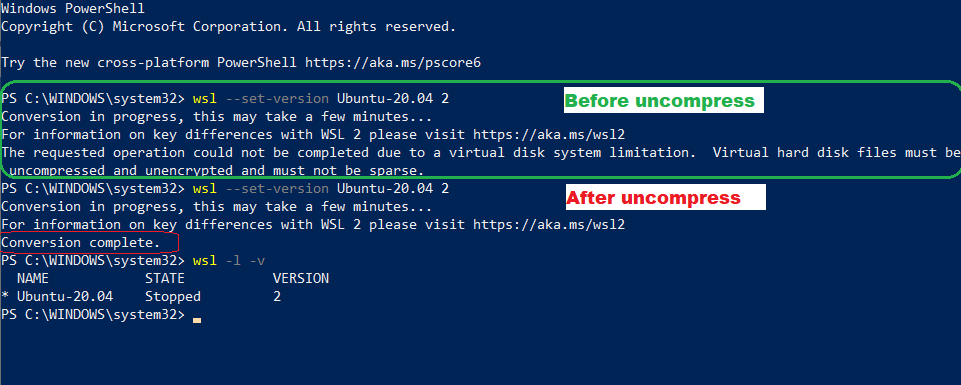
That's right, version 2.
Install XUbuntu Desktop(XFCE)
Without GUI, it's hard to manage the files. Ubuntu shell is just like the Windows' predecessor DOS. So we need a Linux GUI.
In the Ubuntu shell: update and upgrade
sudo apt-get update && sudo apt-get upgrade...
123 upgraded, 0 newly installed, 0 to remove and 1 not upgraded.
1 not fully installed or removed.
Need to get 169 MB of archives.
After this operation, 95.8 MB of additional disk space will be used.
Do you want to continue? [Y/n] yAfter, we can use tasksel manager, which can help us to install multiple packages all at once.
sudo apt-get install taskselAfter that, you can run tasksel.
sudo taskselLet's pick Xubuntu desktop and check OK. Or type directly in command line,
sudo apt install xubuntu-desktopAfter the installation, restart the terminal.
Install XLaunch and PauseAudio
This software will help us to load the Ubuntu Desktop. After you downloaded and installed the X server, you will see XLaunch icon.

Let's run it.
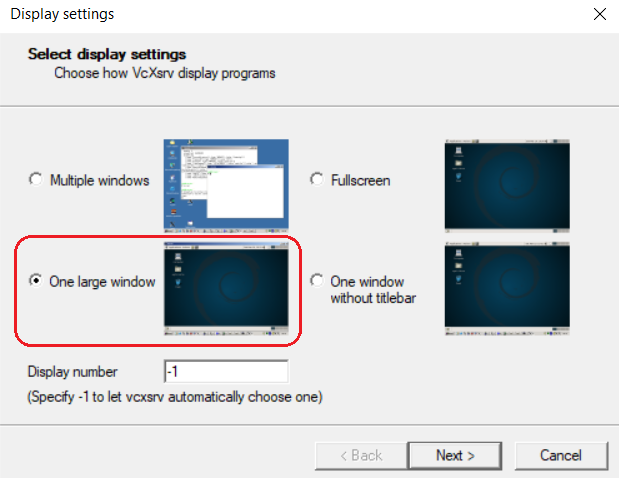
One large window is fine.
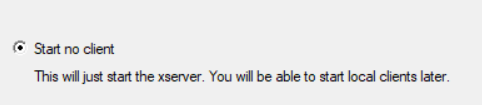
"Start no client" is OK.
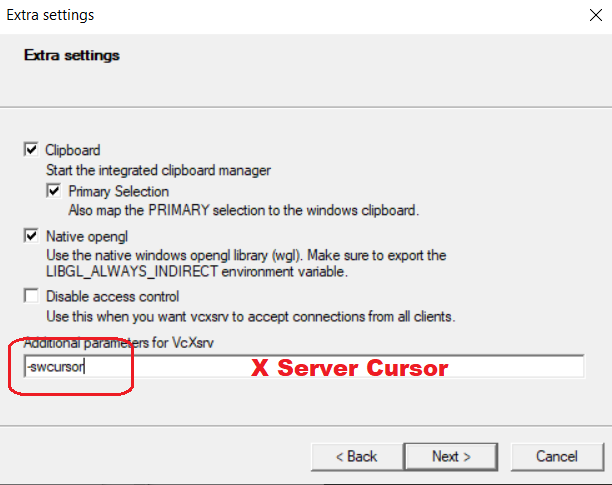
It will activate the cursor in the terminal.

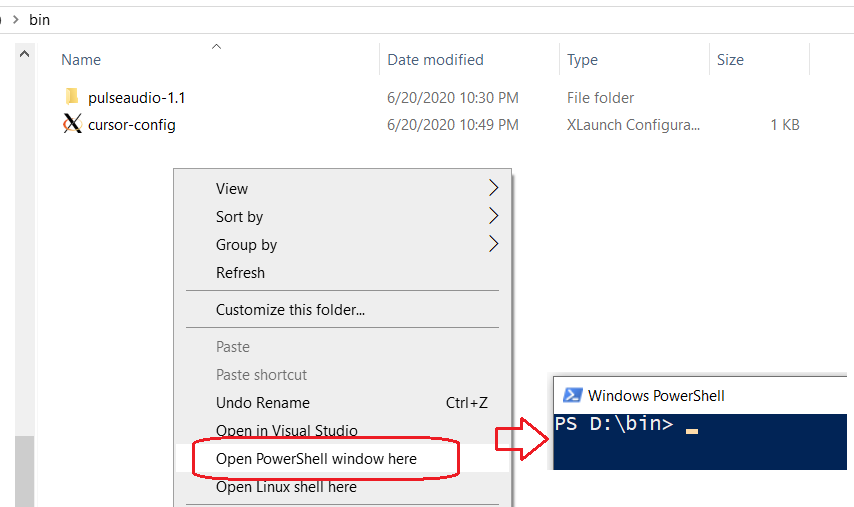
Next, let's save the configuration into a "bin" folder or your folder.
Download and unzip "Pulse Audio" into a "bin" folder.
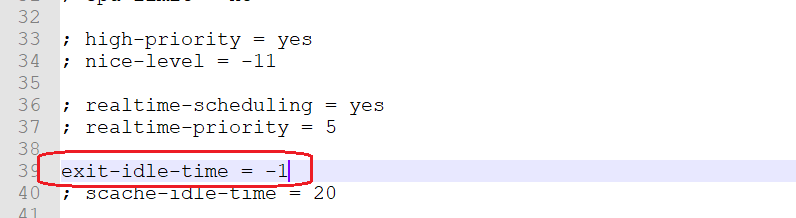
This program transfers audio signal from Linux to the X server. At bin\pulseaudio-1.1\etc\pulse folder, you need to edit *default.pa .*
Line 42:
load-module module-waveout sink_name=output source_name=input record=0Line 61:
load-module module-native-protocol-tcp listen=0.0.0.0 auth-anonymous=1Second, edit *deamon.conf* at line 39th.
Create Batch File: *startx.bat*
In the "bin" folder, shift+rigth-click to load PowerShell.
notepad startx.bat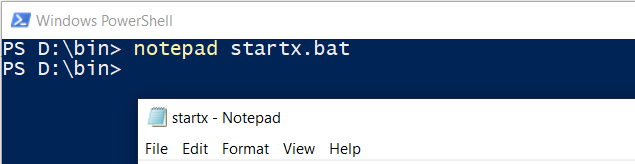
You cannot run the Microsoft Store App directly by entering the name of the executable file. Please follow these steps:
- PowerShell,
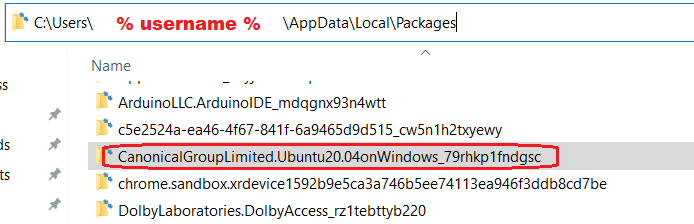
get-appxpackage > 123.txt- Notepad 123.txt and search for ubuntu:

- You have your file location. Next, open its *AppxManifest.xml* file.
notepad "C:\ProgramFiles\WindowsApps\CanonicalGroupLimited.Ubuntu20.04onWindows_2004.2020.424.0_x64__79rhkp1fndgsc\AppxManifest.xml"
You need to package name and ID to call the App. For example,
explorer.exe shell:appsFolder\%Package Name%!%ID%This is my batch input:
@echo offrem start X server
start /B cursor-config.xlaunch
rem start my pulse audio server
start "" /B ".\pulseaudio-1.1\bin\pulseaudio.exe"
rem run ubuntu
start /B explorer.exe shell:appsFolder\CanonicalGroupLimited.Ubuntu20.04onWindows_79rhkp1fndgsc!ubuntu2004Next, we need server IP for the DISPLAY and PULSE_SERVER. In Powershell,
ipconfig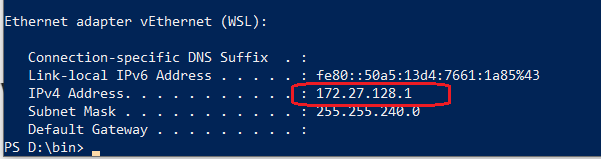
In the Ubuntu shell:
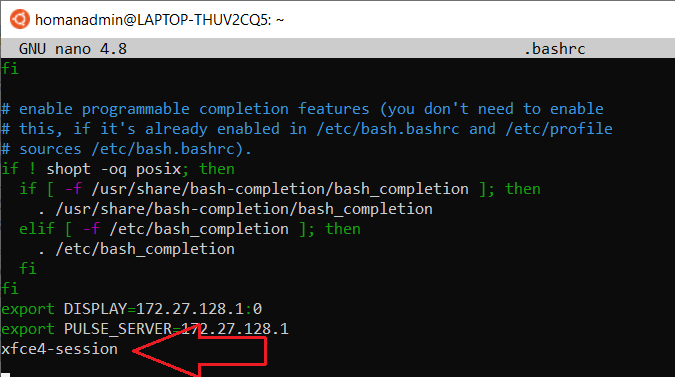
nano .bashrcGo to the end of the file and input the DISPLAY and PULSE_SERVER.
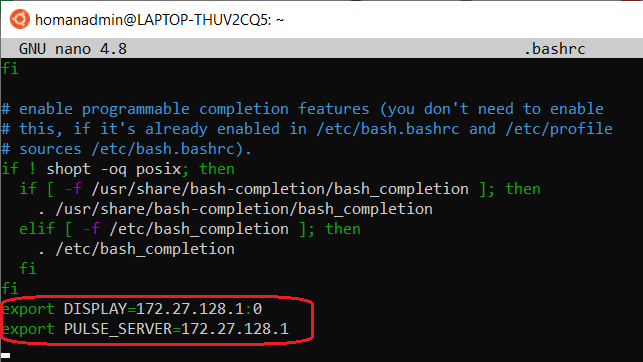
Ctrl+x to save it. Restart the Ubuntu shell.
Connect X Server to Xubuntu-Desktop
Now, let's run the *starx.bat*.

In ubuntu shell:
xfce4-session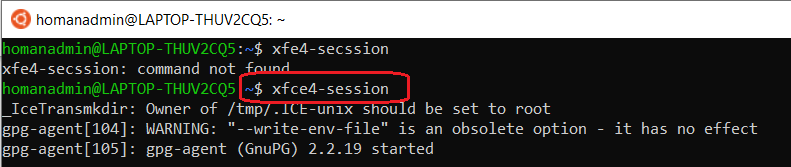
The X Server:
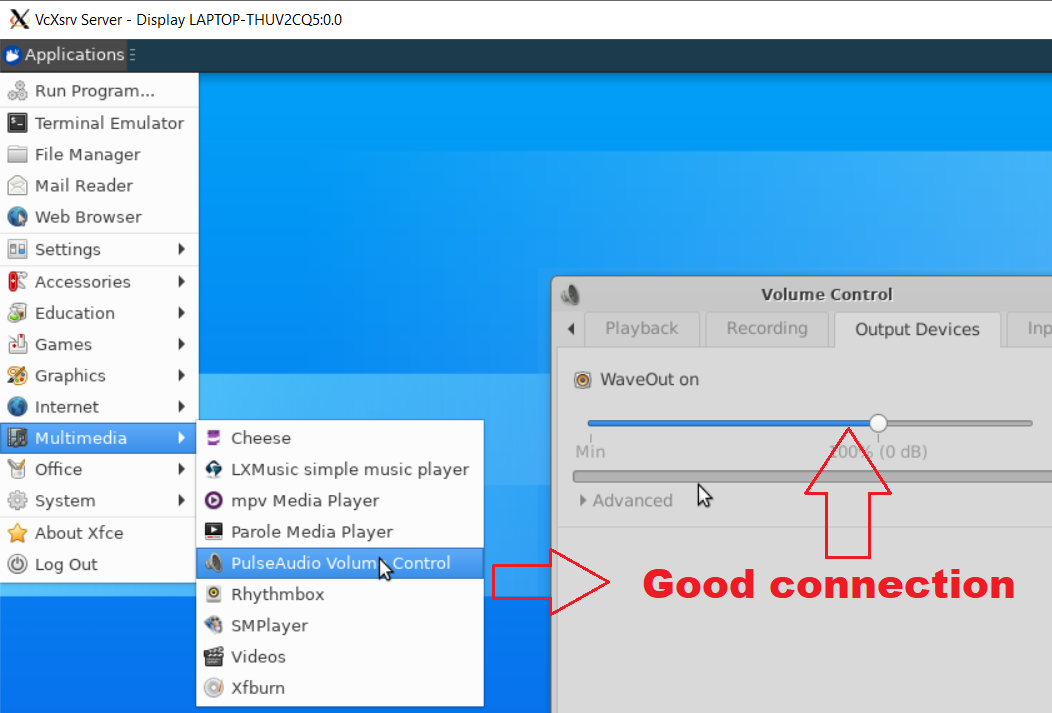
Let's check the connection of the PulseAudio Server.
Advance Bash Script
If you want to autoload the Xfce, please add "xfce4-session" at the *.bashrc*.
Now, close all of the opened windows and run the batch file again. You shall have everything automatically opened but you have to close them manually.
However, your PC will change the host IP after you restart Windows. You have to manually change IP again and again.
😲What?!
……………………..Here is the solution.
You can grab IP from */etc/resolv.conf*
$ cat /etc/resolv.conf# This file was automaticallygenerated by WSL. To stop automatic generation of this file, add the
following entry to /etc/wsl.conf:# [network]# generateResolvConf = falsenameserver 172.19.32.1$This cat command, which prints out the content of a file. We can just print the line of nameserver with grep command.
$ cat /etc/resolv.conf | grep nameservernameserver 172.19.32.1The bar separator "|" can connect commands.
The awk command can help us to print formatted text. By using the grep result as an example, "nameserver" is $1 var, and IP is $2 var. So you can awk IP by $2.
$ cat /etc/resolv.conf | grep nameserver | awk '{print $2}' 172.19.32.1
$In the bash script, we can use commands. Then we can save output into a variable:
MYIP=`cat /etc/resolv.conf | grep nameserver | awk '{print $2}' `It's easy to concatenate the strings by "${A} with ${B}".
export DISPLAY="${MYIP}:0"export PULSE_SERVER="${MYIP}"It's bad for debugging with a blank screen. So I add some echoes. The final result at the end of .bashrc will be:
...echo "Getting Host IP: "
MYIP=`cat /etc/resolv.conf | grep nameserver | awk '{print $2}' `
echo -e "${MYIP}\n ======== \n"
echo -e "\nDisplay:"
export DISPLAY="${MYIP}:0"
echo `export | grep DISPLAY`
echo -e "\nPulse Audio Serve:"
export PULSE_SERVER="${MYIP}"
echo `export | grep PULSE_SERVER`
echo -e "\nLoading XUbuntu Desktop..."
xfce4-sessionWhen Ubuntu is booting, you see:
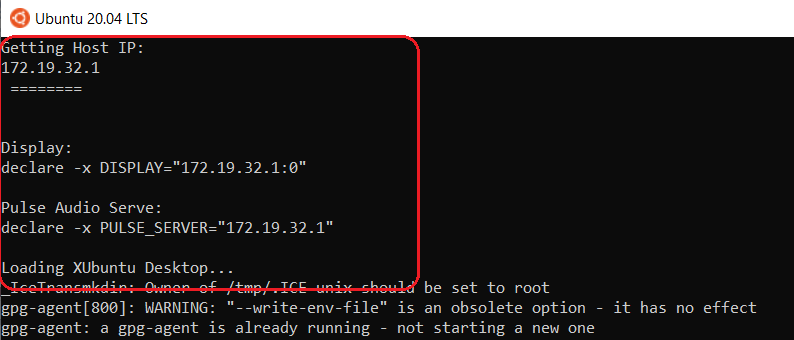
🏄Isn't it looking good?
Virtualization Disabled Bug
If you restart the windows and turn on Ubuntu, you may catch this bug:
Please enable the Virtual Machine Platform Windows feature and ensure virtualization is enabled in the BIOS.For information please visit https://aka.ms/wsl2-install
Press any key to continue...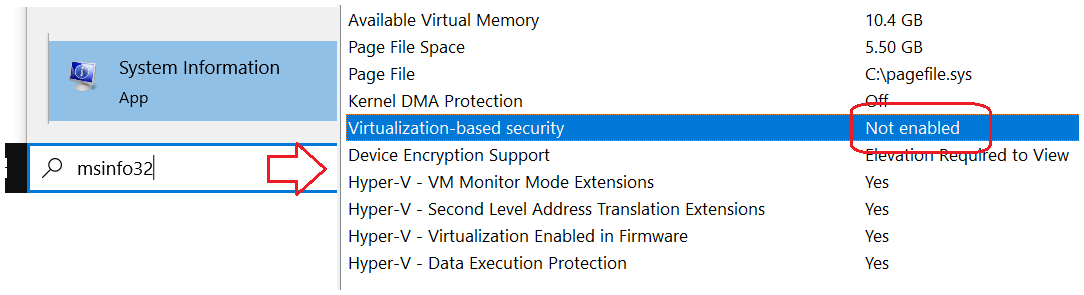
That's the problem. Let's enable it.
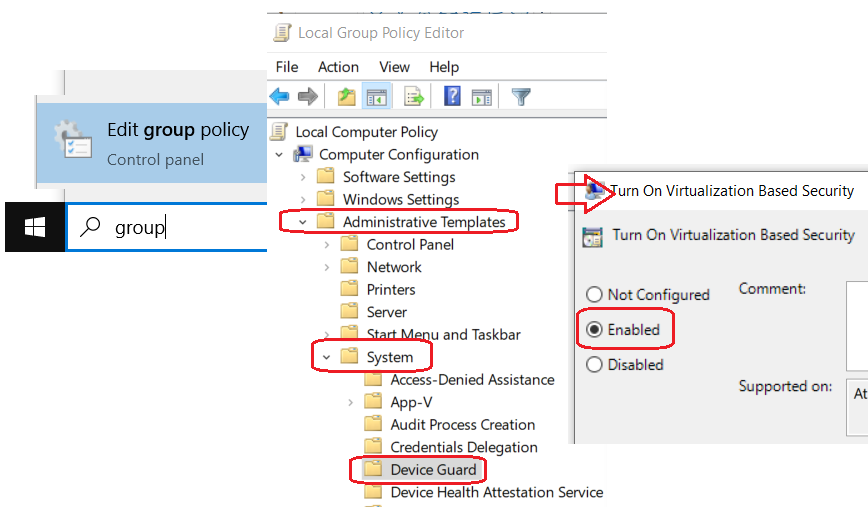
And you need to turn on Hyper-V.
Restart. If your Ubuntu is still not working, please check your update for the new version of Windows.
Mine is Windows 10 Pro 20H2. Ubuntu is working properly.
