MySQL Connector/C++ Building Linux Applications with NetBeans
This section describes how to build MariaDB Connector/C++ applications for Linux using the NetBeans IDE.
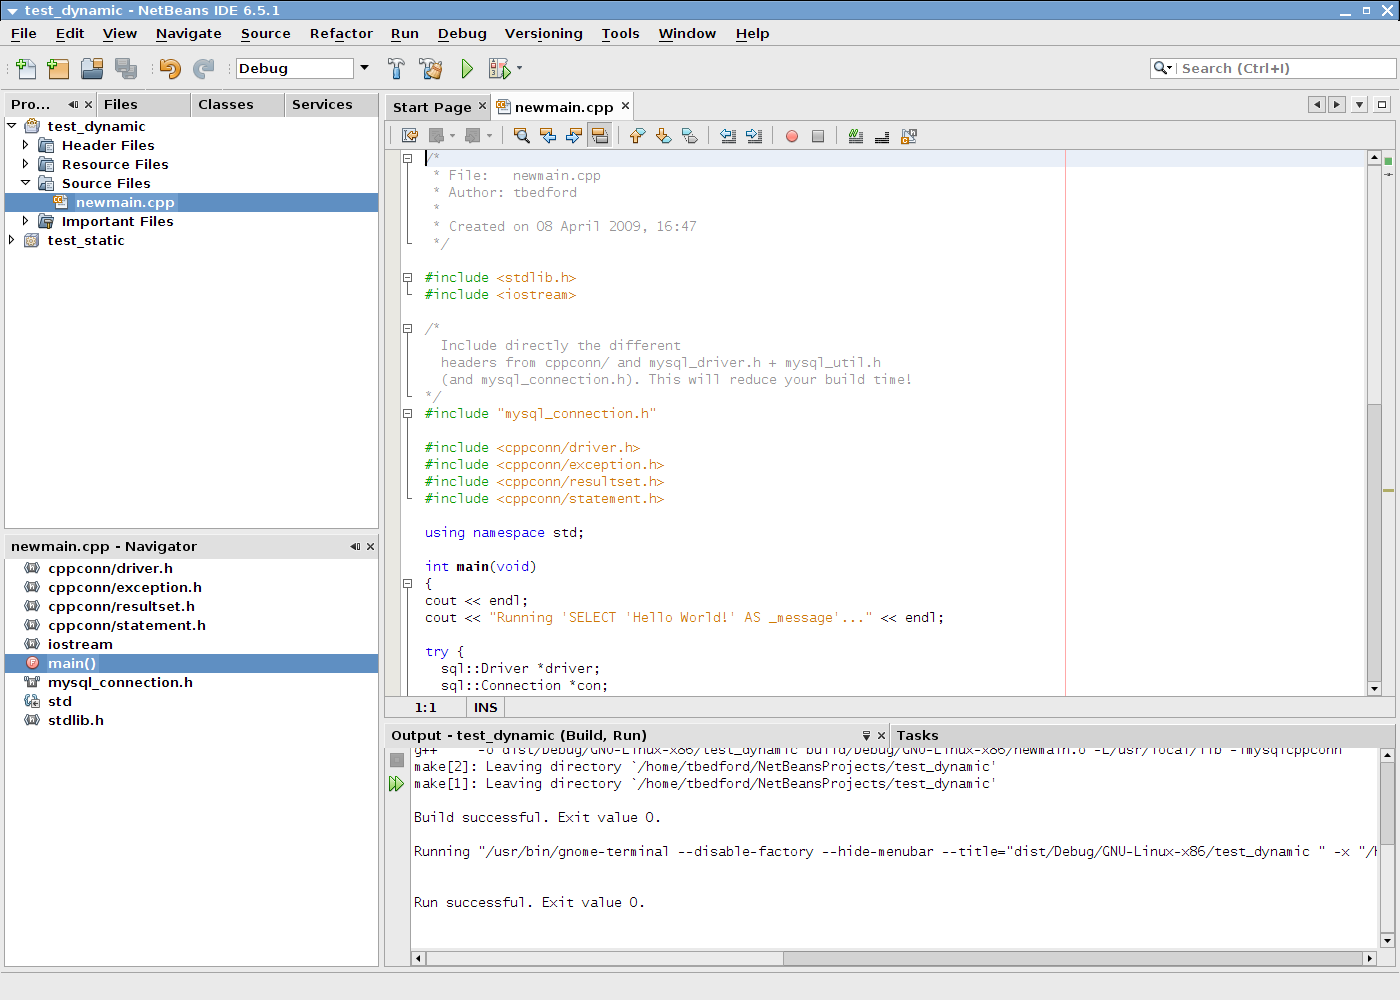
Figure 20.76. The NetBeans IDE
 Note
Note
To avoid potential crashes the build configuration of MariaDB Connector/C++ should match the build configuration of the application using it. For example, do not use the release build of MariaDB Connector/C++ with a debug build of the client application.
- The first step of building your application is to create a new project. Select File, New Project. Choose a C/C++ Application and click Next.
- Give the project a name and click Finish. A new project is created.
- In the Projects tab, right-click Source Files and select New, then Main C++ File....
- Change the filename, or simply select the defaults and click Finish to add the new file to the project.
- Now add some working code to your main source file. Explore your MariaDB Connector/C++ installation and navigate to the
examplesdirectory.
- Select a suitable example, such as
standalone_example_docs1.cpp. Copy all the code in this file, and use it to replace the code in your existing main source file. Amend the code to reflect the connection properties required for your test database. You now have a working example that will access a MariaDB database using MariaDB Connector/C++.
- At this point, NetBeans is showing some errors in the source code. Direct NetBeans to the necessary header files to include. Select File, Project Properties from the main menu.
- In the Categories: tree view panel, navigate to Build, C++ Compiler.
- In the General panel, select Include Directories.
- Click the ... button.
- Click Add, then navigate to the directory where the MariaDB Connector/C++ header files are located. This will be
/usr/local/includeunless you have installed the files to a different location. Click Select. Click OK.
Figure 20.77. Setting the Header Include Directory

- Click OK again to close the Project Properties dialog.
At this point, you have created a NetBeans project, containing a single C++ source file. You have also ensured that the necessary include files are accessible. Before continuing, decide whether your project is to use the MariaDB Connector/C++ static or dynamic library. The project settings are slightly different in each case, because you link against a different library.
Using the static library
To use the static library, link against two library files, libmysqlcppconn-static.a and libmysqlclient.a. The locations of the files depend on your setup, but typically the former are in /usr/local/lib and the latter in /usr/lib. Note the file libmysqlclient.a is not part of MariaDB Connector/C++, but is the MariaDB Client Library file distributed with MariaDB Server. Remember, the MariaDB Client Library is an optional component as part of the MariaDB Server installation process. Note the MariaDB Client Library is also available as part of the MariaDB Connector/C distribution.
- The first step is to set the project to link the necessary library files. Select File, Project Properties from the main menu.
- In the Categories: tree view, navigate to Linker.
- In the General panel, select Additional Library Directories. Click the ... button.
- Select and add the
/usr/liband/usr/local/libdirectories.
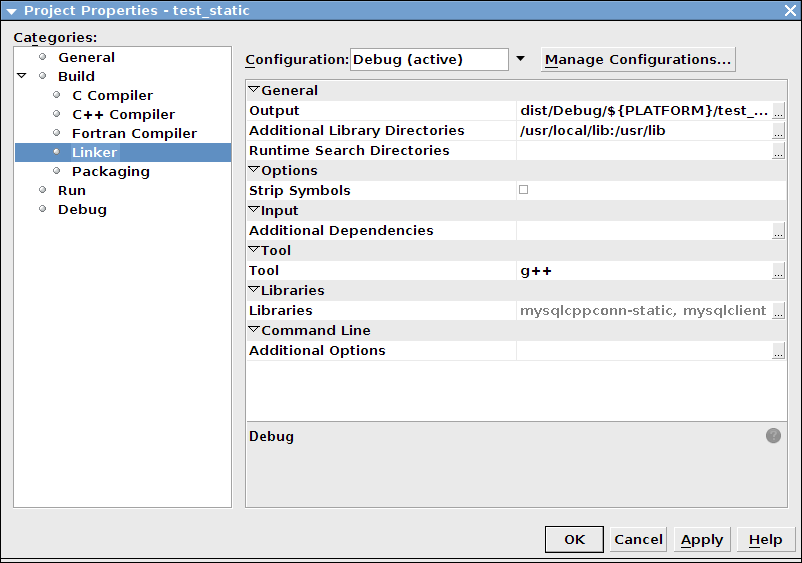
- In the same panel, add the two library files required for static linking as discussed earlier. The properties panel should then look similar to the following screenshot:
Figure 20.78. Setting the Static Library Directories and File Names
- Click OK to close the Project Properties dialog.
Using the dynamic library
For your application to use the MariaDB Connector/C++ dynamic library, you link your project with a single library file, libmysqlcppconn.so. The location of this file depends on how you configured your installation of MariaDB Connector/C++, but is typically /usr/local/lib.
- The first step is to set the project to link the necessary library file. Select File, Project Properties from the main menu.
- In the Categories: tree view, navigate to Linker.
- In the General panel, select Additional Library Directories. Click the ... button.
- Select and add the
/usr/local/libdirectories.
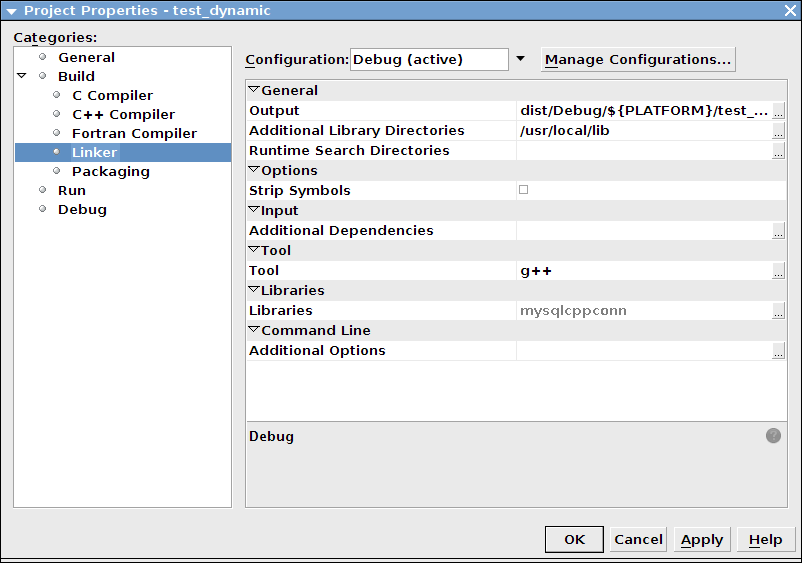
- In the same panel, add the library file required for static linking as discussed earlier. The properties panel should then look similar to the following screenshot:
Figure 20.79. Setting the Dynamic Library Directory and File Name
- Click OK to close the Project Properties dialog.
Having configured your project, you build it by selecting Run, Build Main Project from the main menu. You then run the project using Run, Run Main Project.
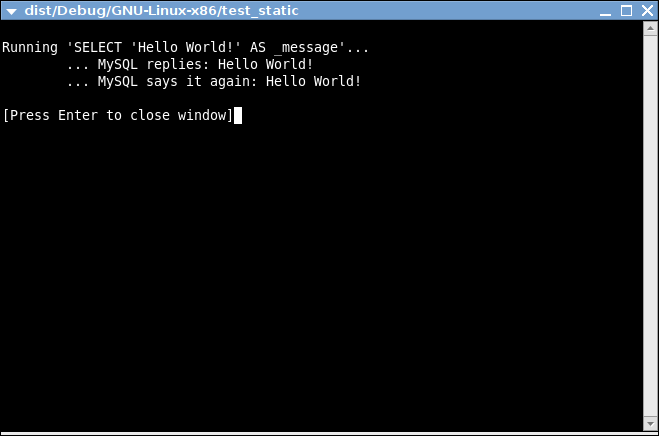
On running the application, you should see a screen similar to the following (this is actually the static version of the application shown):
Figure 20.80. The Example Application Running
 Note
Note
Note the above settings and procedures were carried out for the default Debug configuration. To create a Release configuration, select that configuration before setting the Project Properties.