JumpStart II: Setting Up Apache Using system-config-httpd
JumpStart II: Setting Up Apache Using system-config-httpdTip: Make a copy of httpd.conf As installed, the /etc/httpd/conf/httpd.conf file contains extensive comments and is set up as explained in this chapter. The system-config-httpd utility overwrites this file. Make a copy of httpd.conf for safekeeping before you run this utility for the first time.
You can use the system-config-httpd utility to display the HTTP window, which allows you to edit the /etc/httpd/conf/httpd.conf file to set up Apache. To run this utility, enter system-config-httpd on a command line. From KDE select Main menu: Administration The HTTP window has four tabs: Main, Virtual Hosts, Server, and Performance Tuning. Each field in these tabs/windows corresponds to a directive in the /etc/httpd/conf/httpd.conf file. This section discusses some of the basic directives you can change with system-config-httpd. For more information click Help at the bottom of the HTTP window. Main tab
The Main tab (Figure 26-1) allows you to establish an FQDN (page 1032) as the name of the server (ServerName, page 796), an email address for the server administrator (ServerAdmin, page 795), and the ports and addresses that Apache listens on for requests (Listen, page 795). Highlight an entry in the Available Addresses subwindow, and click Edit to edit that entry or Add to add a new entry. Both actions bring up a window that allows you to specify a port and select whether you want to listen to all IP addresses on that port or listen to a specific address. To get started, set up Apache to listen to all available addresses on port 80. Figure 26-1. HTTP window, Main tab
Virtual Hosts
The Virtual Hosts tab allows you to establish default settings for Apache and set up virtual hosts (page 818). Click the Virtual Hosts tab, and then click Edit to edit the settings for the highlighted virtual host or Add to add a new virtual host. Both actions open the Virtual Host Properties window, General Options tab (Figure 26-2). Figure 26-2. Virtual Host Properties window, General Options tab[View full size image]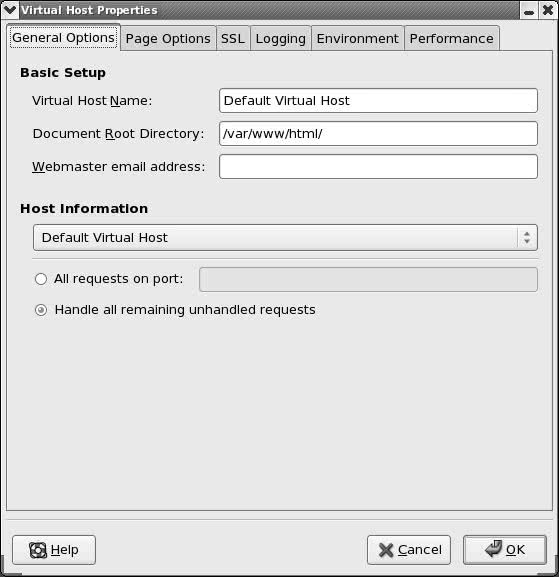 The other tabs in the Virtual Host Properties window are Page Options (Figure 26-3), SSL, Logging, Environment, and Performance. This window is similar to the one you used to establish default settings, except that it pertains to a specific virtual host and has more tabs. You do not have to change most of the values in this window. Click OK when you are done making changes. Figure 26-3. Virtual Host Properties window, Page Options tab[View full size image]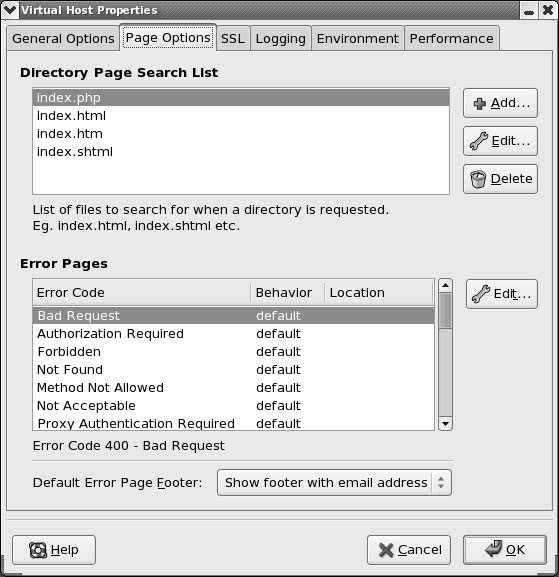 Server tab
Usually you do not need to change the values in the Server tab. You can specify the pathname of the lock file (LockFile directive), the PID file (PidFile directive), and the directory that Apache stores core dumps in (CoreDumpDirectory). The lower portion of the tab allows you to specify the user (User, page 812) and group (Group, page 810) that Apache runs as. Performance Tuning tab
The selections in the Performance Tuning tab control the maximum number of connections that Apache allows (MaxClients, page 802), the number of seconds after which a connection will disconnect (Timeout, page 804), the maximum number of requests Apache allows per connection (MaxRequestsPerChild, page 803), and whether to allow persistent connections (KeepAlive directive). Initially, the values in this tab do not need to be changed. Click OK when you are done making changes and restart httpd as discussed on page 787. |
 Server Settings
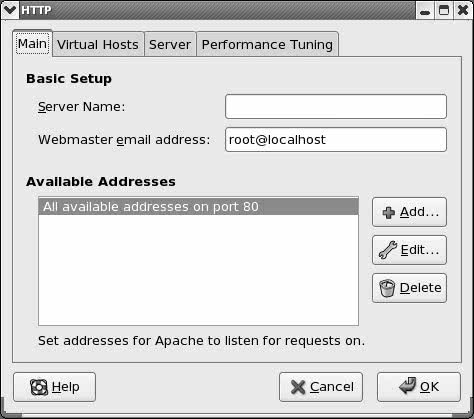
JumpStart I: Getting Apache Up and Running
|