| [ LiB ] |
A Simple GUI with Tkinter
The GUI API approved by Python is a nifty toolkit already familiar to folks in UNIX land, TCL (short for tool Command Language). Tkinker is the library behind common Python window interfaces and its version of TCL. Folks familiar with TCL\Tk in UNIX will find that Tkinter is very familiar. Although the library gets more extensive coverage in Chapter 4, I'll give you a small taste of a GUI that will run on a standard Windows environment to whet your appetite.
NOTE
Other GUI packages besides Tkinter are available for use with Python. For instance, the C STDWIN package is somewhat popular. However, Tkinker is the standard and comes shipped and installed with each Python package, so it's generally the first graphical tool folks discovering Python learn to use.
GUIs in Python are built from GUI components. In Windows, these components are called Windows Gadgets, or widgets for short. These widgets are listed in Table 3.9.
Component | Function |
|---|---|
Button | Creates a button that triggers an event when clicked |
Canvas | Displays text or images |
Checkbutton | |
Entry | Creates a line that accepts keyboard input |
Frame | Creates the outlying window's edge |
Label | Displays text as labels for components |
Listbox | Creates a list of options |
Menu | Creates a multiple-selection display |
Menubutton | Creates a pop-up or pull-down style menu |
Radiobutton | Creates a single option button |
Scale | Creates a slider that can choose from a range |
Scrollbar | Creates a scrollbar for other components |
Text | Creates a multiple line box that accepts user input |
When using Tkinter, you start by importing the library and then creating a frame that houses all of the other components:
From Tkinter import*
window = Frame()
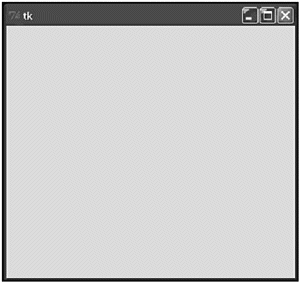
If you run this via a script, or from Python's interactive mode, you will see an empty Tkinter window box appear, as shown in Figure 3.3.
Figure 3.3. Tkinter produces an empty frame widget

Let's add a simple label and a quit button to the widget. You will not be able to run this code in an interactive environment; you will have to actually create a file with a .py extension and run it via command line, DOS prompt, or by double-clicking it. For reference, the completed script can be found in the Chapter 3 folder on the CD.
To add a label, you need to first add the pack method. The pack method is used to determine the size and influence of a given component:
window.pack()
After referencing the pack method, you can add the Label method and specify the text ('Hello') and placement (TOP) inside parentheses:
Label(window, text='Hello').pack(side=TOP)
Finally, you add a button using the Button method, specifying the text ('Exit'), the command the button will execute (.quit), and then you tell the pack method where to place the button (BOTTOM):
Button(window, text='Exit', command=window.quit).pack(side=BOTTOM)
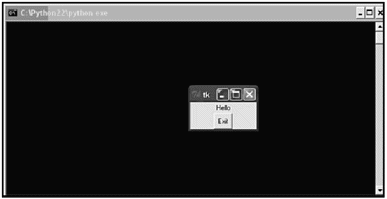
One last step is to use the mainloop method to start the event loop. The full code snip follows and produces something similar to that in Figure 3.4:
Figure 3.4. Tkinter says "Hello" with a slightly more complex widget

from Tkinter import *
window = Frame()
window.pack()
Label(window, text='Hello').pack(side=TOP)
Button(window, text='Exit', command=window.quit).pack(side=BOTTOM)
window.mainloop()
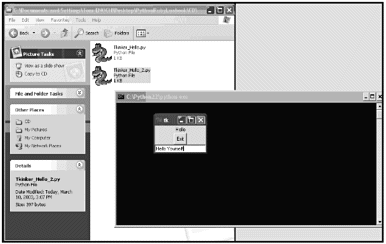
To create a simple user interface utilizing Tkinter, you will need to take advantage of Tkinter's Entry component. Entry works just like raw_input and will take what a user types in and return it after the Enter key is pressed. A simple Entry box can, by adding a line to Tkinter_Hello, specify a name for the widget and tell pack how to display it. Adding this line above the mainloop() command in Tkinter_Hello will give you an entry in the window you created to type into, as shown in Figure 3.5 (this code sample is also on the CD as Tkinter_Hello_2.py).
Figure 3.5. Now the Tkinter widget also has an entry box for typing into

Entry(name = "text1").pack(expand = YES, fill = BOTH)
| [ LiB ] |