Using the Colors section of the Tools panel
The Colors section of the Tools panel contains controls for activating the Stroke Color and Fill Color boxes, which in turn determine whether the strokes or fills of selected objects are affected by color choices. Also, the Colors section has controls for quickly resetting colors to the default, setting the stroke and fill color settings to None, and swapping fill and stroke colors.
To make the Stroke Color or Fill Color box active:
- In the Tools panel, click the icon next to the Stroke Color or Fill Color box. The active color box area appears as a depressed button in the Tools panel.
NOTE
The Paint Bucket tool fills pixel selections and vector objects with the color shown in the Fill Color box in the Tools panel.
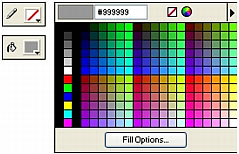
Color boxes in the Tools panel and the color pop-up window
To reset colors to the default:
- Click the Default Colors button in the Tools panel or in the Color Mixer.
To remove the stroke and fill from selected objects using the No Stroke or Fill button:
- Click the No Stroke or Fill button in the Colors section of the Tools panel.
The active characteristic changes to a stroke or fill of None.
- To set the inactive characteristic to None as well, click the No Stroke or Fill button again.
NOTE
You can also set the fill or stroke of selected objects to None by clicking the Transparent button in any Fill Color or Stroke Color box pop-up window, or by selecting None from the Fill Options or Stroke Options pop-up menu in the Property inspector.
To swap fill and stroke colors:
 Click the Swap Colors button in the Tools panel or in the Color Mixer.

