Create and edit a rounded rectangle
The first object to create is a rounded rectangle that represents the top and bottom bars of the content area. You decide to create a large rounded rectangle that defines the total extent of the content area.
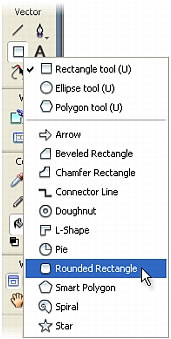
- Select the Rounded Rectangle tool in the Vector section of the Tools panel.
The Rounded Rectangle tool is a shape tool. Click the expander icon on the shape icon to select it.
- In the Document window, position the cross-hair pointer over the canvas, and drag downward and to the right to create the shape.
You can draw the rounded rectangle anywhere on the canvas. Don't worry about size and position at this point; you'll resize and position it later in this procedure.
- When you release the mouse button, a rounded rectangle appears, selected, in the area you defined.
You can see when an object is selected because it displays blue corner points. Most objects also have a blue highlight around their outer edges, but rectangles are an exception. A rounded rectangle shape also has control points that appear as yellow diamonds. These control points let you change the size and corner roundness of the rounded rectangle.
- With the rounded rectangle still selected, in the Property inspector, click the Fill Color box next to the bucket icon.
The Fill Color pop-up window opens.
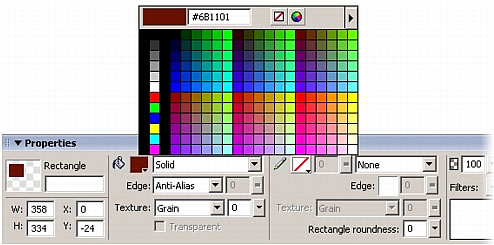
- Type 6B1101 in the text box at the top of the window, and then press Enter.
- Click the Stroke Color box next to the pencil icon, and then click the Transparent button at the top of the Stroke Color pop-up window. (It should be selected by default.)
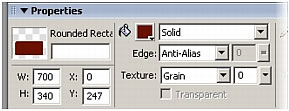
The rounded rectangle now has a dark red fill and no stroke.
Next, you need to resize and position the rounded rectangle. You decide to do this precisely with the Property inspector.
- With the rounded rectangle still selected, in the Property inspector, type 700 in the width box (W), type 340 in the height box (H), type 0 for the X position, type 255 for the Y position, and then press Enter to apply the last value.
NOTE
The Y position is only an approximation. You can alternatively use the arrow keys to nudge the rounded rectangle up or down until it is about 6 pixels below the slideshow placeholder image.
After resizing the rounded rectangle, you notice that the rounded edges are distorted. You want to adjust these to create appropriately rounded corners.
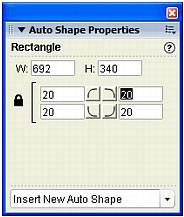
The rounded rectangle is a Fireworks Auto Shape, so you can use the Auto Shape Properties panel to adjust the roundness of the corners.
- With the rounded rectangle still selected, open the Auto Shape Properties panel by selecting Window > Auto Shape Properties (not Window > Auto Shapes).
- Enter 20 for the roundness of the first corner, and then press Enter.
Because the values are locked, changing one roundness value changes all the other values.
At the same time, Fireworks adjusts the corners of the shape on the canvas.
- Close the Auto Shapes Properties panel, and then click anywhere outside the canvas to deselect the rounded rectangle.
- Save your work.

