Converting VCD to Divx
Converting a Video CD (VCD) to Divx is usually easier to do than converting a DVD CD. But why convert? Simple, VCD's take up two 650MB CD-R's whereas Divx almost always use one CD-R. The file size of the average Divx is usually about 600 MB's so exchanging them over the Internet becomes much easier.
Programs you will need
Note: Most programs will require that Windows Media Player is installed and fully up to date i.e.. Install the latest Media Player upgrade! You will probably also need Direct X 7.0 installed and Direct X Media (which is different from Direct X and needs to be installed as well). Be warned, though, you will not be able to uninstall Direct X 7 one it is done. Peck's Power Join is just to stick the two VCD CD mpegs together. Anything that either sticks Divx or VCD mpegs together will do the job. For example, you can use IFilmEdit, VCD Cutter, Camel's MpegJoin etc. But with these you must copy 'both' VCD Mpegs on to your hard drive and then stick them together. VirtualDub is also additional and will only be used if you have sound synchronization problems.
Step 1. Extracting the Dat File
Make a Folder on your hard drive and call it GEAR. Put inside this folder the program VCD Gear. The VCD Gear program doesn't need to be installed just copied to this folder.
(a) Insert your first VCD into your CD-ROM
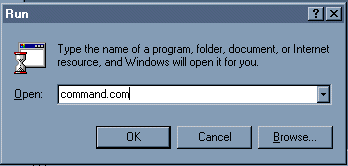
(b) To run VCD Gear you will need to open the MS-DOS Prompt. Either do this with the icon (i.e.. Programs > MS-DOS Prompt) or just go to START > RUN. And then type Command.com ie:
Change to the GEAR folder you created ie. type:
Okay, make sure you name the file locations correctly. Type the following command line:
VCDGEAR -dat2mpeg -fix D:MPEGAV\AVSEQ01.DAT C:\GEAR\AVSEQ01.MPG
The first part in Green is the commands to convert the dat file and fix the broken structure. The Red part is the location of the dat file on your CD-ROM. The Blue part is where on your computers Hard Disk the converted file will be placed. Don't just copy the above put the correct locations in place of the Red and Blue text.
It will look like this:
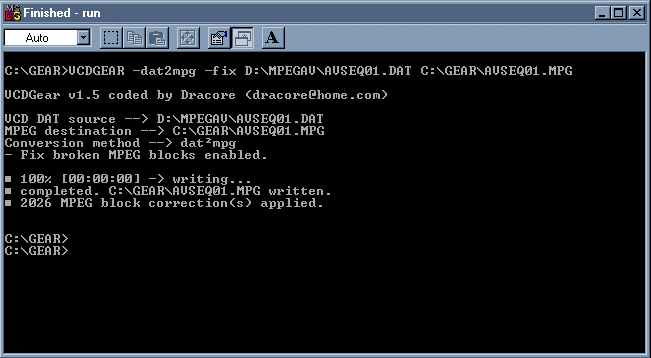
This all should take about 15 minuets. When it is finished you will have a fully compliant Mpeg-1 file in which you can convert to Divx. Move on to Step 2.
Note: Many people are of the opinion that because they can play VCD *.dat files in most Mpeg players the *.dat file is the same as an Mpeg. This is not the case! A VCD mpeg is basically an Mpeg-1 file but just like the DVD VOB files the *.dat file also contains other pieces of information needed to play the VCD in a commercial VCD player. These files need to be deleted otherwise you will not be able to do anything with the Mpeg movie. This is why we need VCD Gear.
Step 2. Converting the Video and Audio to Divx
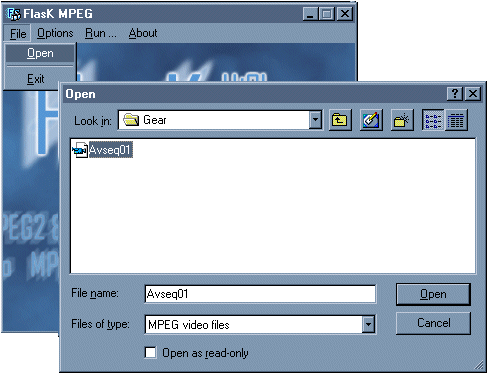
Make sure you have the Divx Codec installed along with all the Windows upgrades mentioned at the start. You may as well install the Radium MP3 Codec here too. Now run Flask Mpeg 0.58 and open the VCD mpeg file:
Under Options > Global Project Options use the following Settings:

Note: the 720 x 480 is DVD settings but I find that this setting works best for me! The finished Divx will look just like a DVD Rip. Selecting a smaller resolution will not significantly reduce the filesize or compression speed. The above Time Base (fps) is set to a PAL CD. If your CD is NTSC you can choose 29.97 (fps).
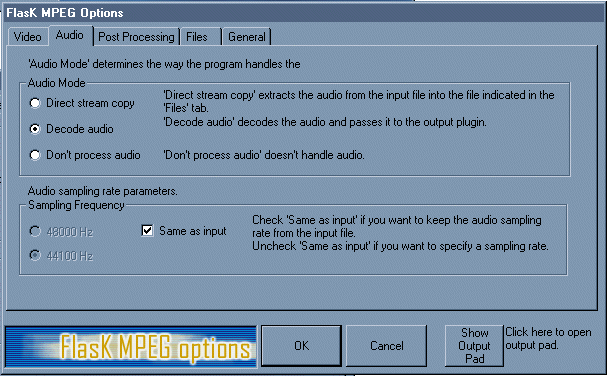
Now the audio tab should be set to Decode Audio:
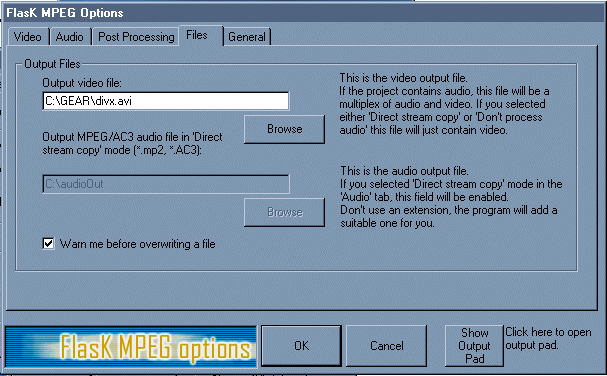
Under the Files tab you can tell Flask where to save your Divx ie:
Leave everything else alone and click OK.
Select Run > Start Conversion.
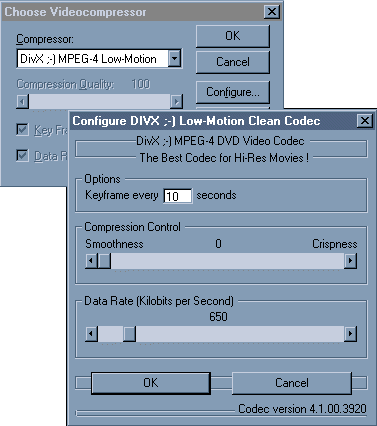
The following Dialogue box will appear. You must click on both the Audio and the Video Select Codec buttons to select the correct Codec's for Divx:

Under the Video Codec Select DivX ;-) MPEG-4 Low-Motion. Press the Configure button for additional settings. I set the Compression Control to 0 Crispness. You can play about with these settings if you like to see how it turns out. What Data Rate to choose depends on your finished film length, this is the length of both VCD's added together.
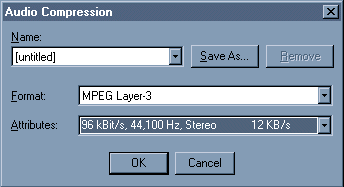
Now select the Audio Settings. Choose MPEG Layer 3 and 96 kBit/s, 44,100 Hz, Stereo 12KB/s. Actually many Divx use 64 kBit/s audio, so you can select that if you wish.
That's it! Sit back and wait for the finished Divx from VCD! It should take less than 6 hours per CD using a 500MHZ computer.
Step 3. Sticking the two Divx files together
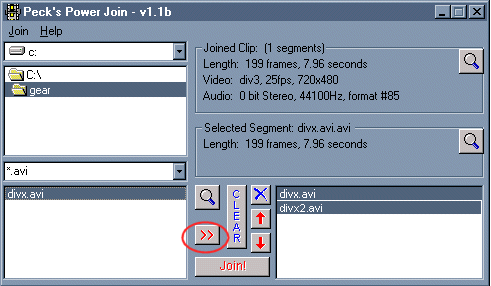
This is simple enough using Peck's Power Join. Find the two files and add them to the list in correct order from top to bottom. Press the add to list button to add each one (circled in red). When done press Join! That's it! You now have a finished Divx movie converted directly from a VCD and small enough to fit on a single CD-R.
Troubleshooting
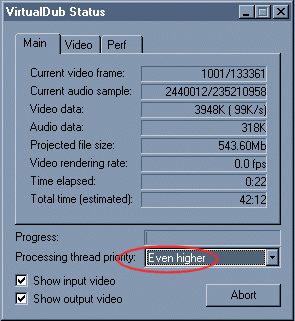
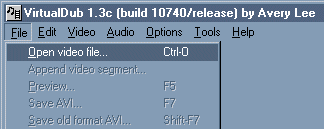
The only serious problem I have encountered using this method is that sometimes the sound synchronization is out. If this happens run VirtualDub and open the finished Divx file.
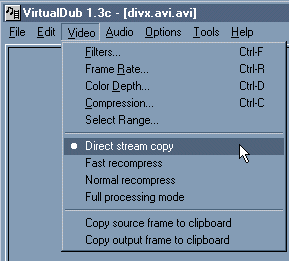
Go to the Video settings and select Direct stream copy.
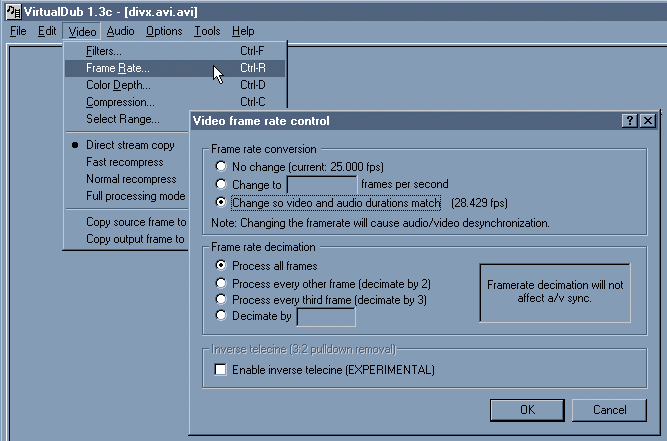
Choose Frame Rate > Change so video and audio duration's match. Click OK.
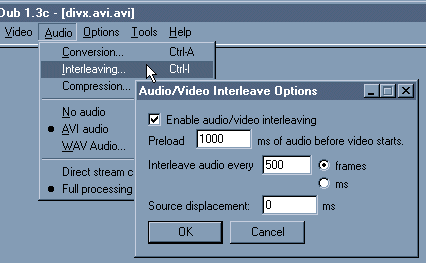
Go to the Interleaving options and set it to Preload 1000 ms of audio and interleave audio after every 500 frames. Click OK.
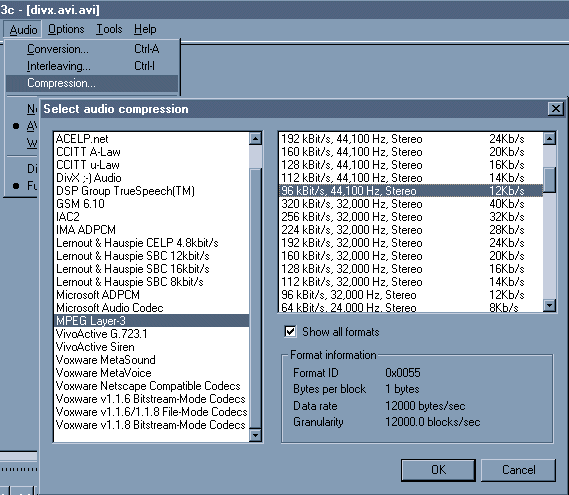
Choose the Audio Compression option > MPEG Layer-3. Click Show all formats and select 96 kBit/s, 44,100 Hz, Stereo (or 64 kBits/s).
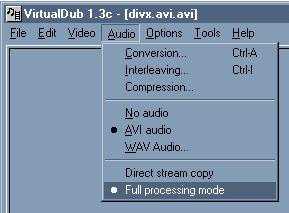
Go to the Audio settings. Make sure it is set to AVI audio and select Full processing mode.
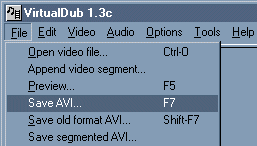
Finally, choose Save AVI and select where you wish to save it on your hard disk.
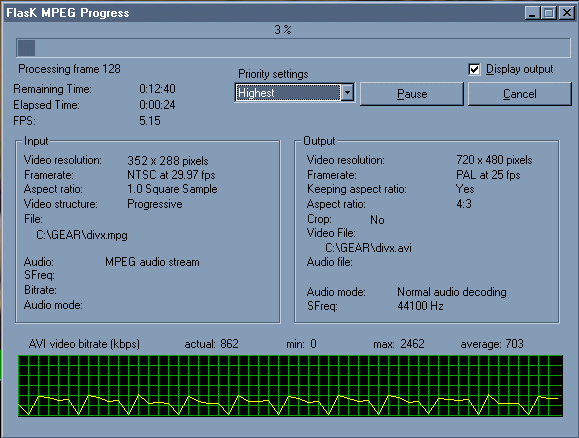
The following box will appear showing details of its progress. In about 10 to 15 minuets your fixed Divx will be complete. To speed up this process you can also select a higher priority in the processing thread priority box (circled in red).