Separator
If the current menu item should be a separator (checked) or a typical menu item (unchecked).
![]()
Menu Bar
OverviewDialogMenu ItemSample Menu
Adding functionality to a menu bar is as easy as adding a few if statements to the On Menu event of your page. For this example, we will be interacting with the following menu bar:
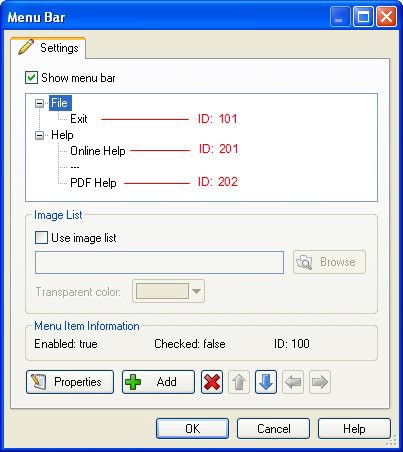
With the above settings, the menu bar will appear as follows:
We have three tasks to perform with this menu bar:
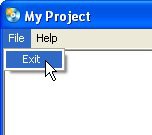
File > Exit
For this task, we'll use the following action:
Application.Exit();
![]()
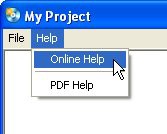
Help > Online Help
For this task, we'll use the following action:
![]()
File.OpenURL("http://www.indigorose.com/onlinehelp.htm", SW_SHOWNORMAL);
Help > PDF Help
For this task, we'll use the following action:
![]()
File.Open(_SourceFolder .. "\\AutoPlay\\Docs\\PDF_Help.pdf", "", SW_SHOWNORMAL);
Now that we have the scripts that we'll use, the only task left is to tie the actions to the menu bar. This is accomplished by using the page's On Menu event, and a few if statements:
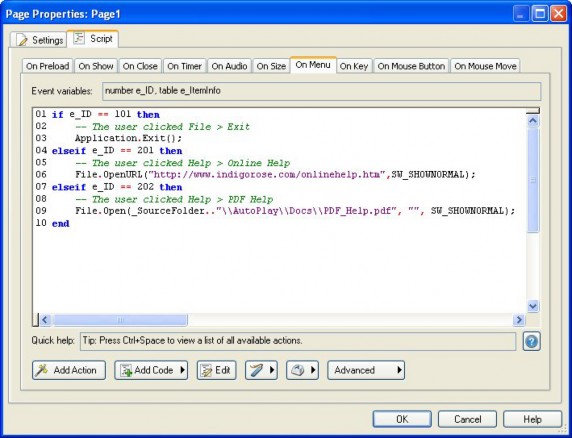
And like magic, your application is now sporting a shiny, fully loaded (and fully functional) menu bar.
Au d i o S e tt i n g s
![]()
Audio Settings
OverviewBackground MusicSound Effects
This is the area where you can add any background audio tracks you wish to play in your application and set the default sound effects that are used for all objects.
Note: The following audio formats are supported in AutoPlay Media Studio: .wav, .ogg, .raw, .aif,
![]()
.aiff. (See Supported File Types for more information.) There are two tabs on the Audio Settings dialog:
· Background Music
· Sound Effects
Tip: To access the Audio Settings dialog, choose Project > Audio from the menu.
![]()
![]()
Audio Settings
OverviewBackground MusicSound Effects
T rack Li s t
The background audio tracks you wish to play in your application.
Click the add button to choose an audio file through the Select File dialog. Repeat this step if you wish to include multiple files. You can manipulate the Track List by first highlighting the audio track, then either clicking the delete button or the arrow buttons to achieve the desired audio list.
Note: The following audio formats are supported in AutoPlay Media Studio: .wav, .ogg, .raw, .aif,
.aiff. (See Supported File Types for more information.)
![]()
P l ay M od e
Sequential
Play the audio tracks in the order they appear in the Track List. The first track in the list will be the first played, followed by the second until there are no more tracks in the list.