end
The "function" keyword tells AutoPlay that what follows is a function definition. The function_name is simply a unique name for the function. The arguments part is the list of parameters that can be passed to the function when it is called. It's essentially a list of
variable names that will receive the values that are passed. (The resulting variables are local to the function, and only have meaning within it.) A function can as many arguments as you want (even none at all).
The "return" keyword tells the function to return one or more values back to the script that called it.
The easiest way to learn about functions is to try some examples, so let's dive right in.
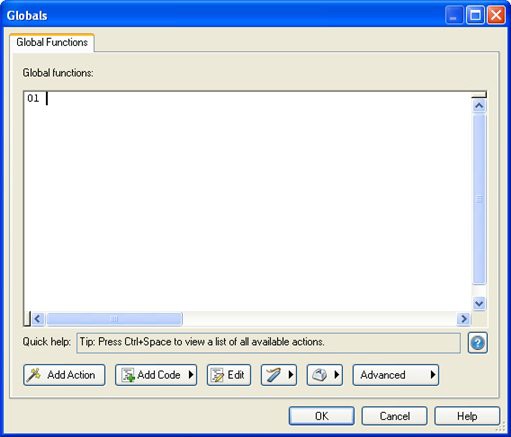
1 ) C hoo s e P r oj ec t > Glob a l Fun c t ion s .
This opens the Global Functions dialog.
The Global Functions dialog is a convenient place to put any functions or variables that you want to make available throughout your project. Any script that you add on this dialog will be performed when your application is launched, right before the project's On Startup event is triggered.
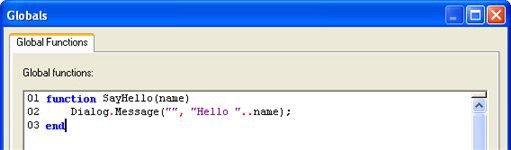
2 ) A dd t h e f ollowing s cr ip t: f un c t ion S ayHe llo ( n ame )
D i a log. M e ss a g e ("" , " He llo " .. n ame ) ;
e nd
Wh e n y ou ' re don e , c li ck O K t o c lo s e t h e di a log.
This script defines a function named SayHello that takes a single argument (which we've called "name") and displays a simple message.
Note that this only defines the function. When this script is performed, it will "load" the function into memory, but it won't actually display the message until the function is called.
It should look like this when you're done:
Once you've entered the function definition, click OK to close the Global Functions dialog.
3 ) A dd a bu tt on t o t h e p a g e , a nd a dd t hi s s cr ip t t o i t s On C li ck eve n t: S ayHe llo (" M r . A nd er s on " ) ;
This script calls the SayHello function that we defined on the Global Functions dialog, passing the string "Mr. Anderson" as the value for the function's "name" parameter.
4 ) P rev i e w t h e p r oj ec t a nd c li ck on t h e bu tt on obj ec t .
When you click on the button object, the script on the object's On Click event calls the SayHello function, which then displays its message.
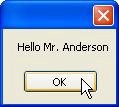
Note that the SayHello function was able to use the string that we passed to it in the message it displayed.
5 ) E x i t t h e p rev i e w. C hoo s e P r oj ec t > Glob a l Fun c t ion s , a nd a dd t h e f ollowing s cr ip t b e low t h e S ayHe llo f un c t ion :
f un c t ion G e t Name ( )
lo ca l n ame = D i a log. I npu t("" , " Wh a t i s y ou r n ame :" ) ; re t u r n n ame ;
e nd
Wh e n y ou ' re don e , c li ck O K t o c lo s e t h e di a log.
The end result should look like this:
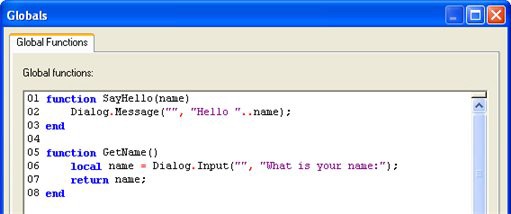
This script defines a function called GetName that does not take any parameters. The first line inside the function uses a Dialog.Input action to display a message dialog with an input field on it asking the user to type in their name. The value returned from this action (i.e. the text that the user entered) is then stored in a local variable called name.
The "local" keyword makes the variable only exist inside this function. It's essentially like saying, "for the rest of this function, whenever I use 'name' I'm referring to a temporary local variable, even if there's a global 'name' variable which may happen to exist." Using local variables inside functions is a good idea-it prevents you from changing the value of a global variable without meaning to. Of course, there are times when you want to change the value of a global variable, in which case you just won't use the "local" keyword the first time you assign anything to the variable.

The second line inside the function returns the current value of the local "name" variable to the script that called the function.
Tip: We could actually make this function's script fit on a single line, by getting rid of the variable completely. Instead of storing the return value from the Dialog.Input action in a variable, and then returning the contents of that variable, we could just put those two statements together, like so:
function GetName()
return Dialog.Input("", "What is your name:");
end
This would make the GetName function return the value that was returned from the Dialog.Input action, without storing it in a variable first.
6 ) E di t t h e s cr ip t in t h e bu tt on obj ec t ' s On C li ck eve n t s o i t loo k s li ke t hi s in s t ea d :
s t rName = G e t Name ( ) ; S ayHe llo ( s t rName ) ;
It should look like this when you're done:
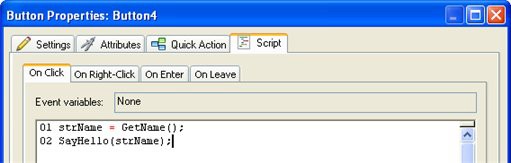
The first line calls our GetName function to ask the user for their name, and then stores the value returned from GetName in a variable called strName.
The second line passes the value in strName to our SayHello function.
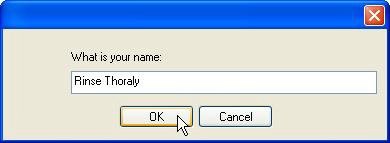
7 ) P rev i e w t h e p r oj ec t . T ry ou t t h e s cr ip t b y c li ck ing on t h e bu tt on obj ec t .
When you click on the button object, an input dialog will appear, asking you to enter your name.
After you type in your name and click OK (or press Enter), a second dialog box will appear, greeting you by the name you entered.
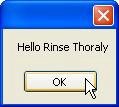
Pretty neat, huh?
8 ) E x i t t h e p rev i e w. E di t t h e s cr ip t in t h a t s ame bu tt on obj ec t ' s On C li ck eve n t s o i t loo k s li ke t hi s :
S ayHe llo ( G e t Name ( )) ;
This version of the script does away with the strName variable altogether. Instead, it uses the return value from our GetName function as the argument for the SayHello function.
In other words, it passes the GetName function's return value directly to the SayHello function.
Whenever a function returns a value, you can use a call to the function in the same way you would use the value, or a variable containing the value. This allows you to use the return value from a function without having to come up with a unique name for a temporary variable.
9 ) P rev i e w t h e p r oj ec t , a nd t ry ou t t h e s cr ip t a g a in. Wh e n y ou ' re don e , ex i t t h e p rev i e w.
The script should work exactly the same as before: you'll be asked for your name, and then greeted with it.
This is just a simple example, but it should give you an idea of what an incredibly powerful feature functions are. With them, you can condense large pieces of script into simple function calls that are much easier to type and give you a single, central location to make changes to that script. They also let you create flexible "subroutines" that accept different parameters and return results, just like the built-in AutoPlay actions.
And despite all that power, they are really quite simple to use.
Where to Go from Here
Well, that's the last lesson. I hope you've enjoyed learning about AutoPlay, and have found this user's guide both useful and helpful.
Feel free to join your fellow AutoPlay Media Studio users in our online forums, where assistance and camaraderie abound. You can join in the fun by choosing Help > User Forums right from the AutoPlay program menu.
While you're at it, be sure to check out the online program reference and the helpful list of "How do I...?" questions as well.
There is a lot more that you can learn about this product, if you ever find the need or desire to. Chances are, if there's something you want to do with AutoPlay, there's at least one way to do it, and probably more.
As one of our wisest users once said, AutoPlay is easy to learn, but difficult to master.
In this lesson, you learned how to:
• Display a message
• Use a variable
• Add an if statement
• Test numeric values
• Set a button object's text
• Concatenate strings
• Compare strings
• Use a for loop
• Create functions
![]()
![]()
Ac t i o n s
OverviewAlphabetical ListError Codes
What are actions?
Actions are the commands that your AutoPlay application can perform at run time. Each action is a discrete instruction that tells the application to do something-whether it's to pause a video, open an external document, or jump to another page.
In other words, actions are what make your application do stuff.
And there's a lot of stuff your applications can do! (Just have a look at the alphabetical list of actions.)
When do actions happen?
Actions are always triggered by events. An event is something that occurs at run time while the user is using your application. This includes things like moving the mouse over an object (an "On Enter" event), clicking on an object (an "On Click" event) or jumping to a different page (an "On Show" event).
Where do I find these events?
When you select an object, you can see the events that the object supports on the properties pane, in the Actions category.
The events will also appear as tabs on the script editor, which you can access by double-clicking on the object, and then clicking on the Script tab.
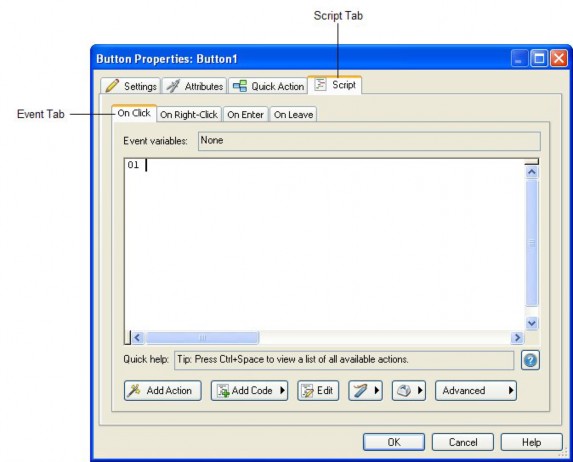
Different objects support different events. For example, each button object has four events listed on the properties pane: On Click, On Right-Click, On Enter, and On Leave. By adding actions to the On Click event, you can make your application do something whenever the user clicks on that particular button object.
The whole project, other objects, and each individual page and dialogs all have their own events as well.
How do I add an action?
To add an action, simply click on the event (in the properties pane) that you want to add the action to, and then click the edit button to open the script editor.
You can also access the script editor by double-clicking on an object, page or dialog surface, and then clicking on the Script tab.
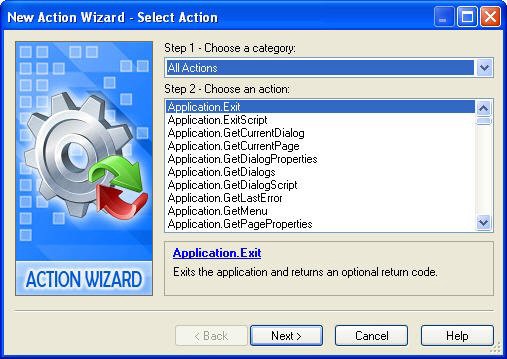
Once the script editor is open, you can either type in the action directly, or click on the Add Action button to walk through the process using the New Action wizard.
How do I edit an action?
Once you've added an action, you can edit its text the same way you would edit a paragraph in Word.
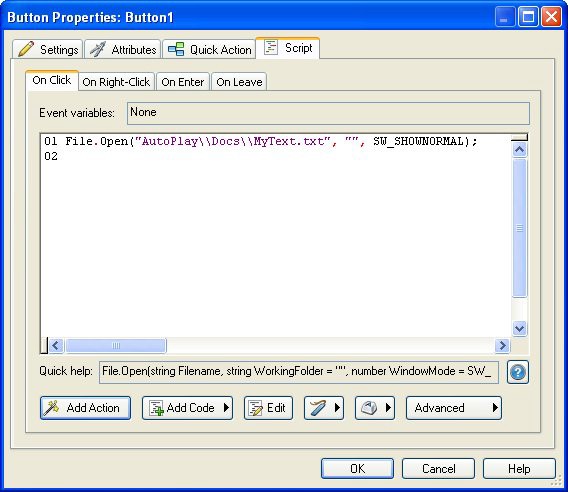
Or, you can double-click the line that the action is on, to edit it using the Action Properties dialog.

Q u i ck Ac t i o n s
![]()
Quick Action
Overview
None Show Page
Show Dialog Close Dialog Run Program Open Document Print Document Send Email View Website Explore Folder Play Multimedia
Play/Pause Background Music
Exit/Close
![]()
Quick Action
OverviewClose Dialog
Closes the currently displayed dialog in your project.
P r op er t i e s
None.
Tip: To send a specific return code, use a DialogEx.Close action on the object's Script tab.
![]()
![]()
Quick Action
OverviewExit/Close
This action will exit the application.
P r op er t i e s
None.
Tip: To send a specific return code, use an Application.Exit action on the object's Script tab.
![]()
![]()
Quick Action
OverviewExplore Folder
Explores a folder on the CD-ROM.
Note: This is the same as right-clicking on a folder in Windows and choosing "Explore."
![]()
P r op er t i e s
Folder:
The path to the folder on the CD-ROM that will be explored. Click the Browse button to select a folder.
![]()
Tip: You can clear the current text from the field by right-clicking in the field and selecting Clear Text.
Run Mode
The window mode you want to use. Choose from Normal, Minimized and Maximized.