In this lesson, you learned how to:
• Build to a folder on your hard drive
• Build a compressed executable
• Burn a CD-R, CD-RW, DVD±R, DVD±RW or BD-R/RE
L ess o n 10 : S c r i p t i n g B as i cs
This lesson will teach you some of the basics of scripting in AutoPlay. Although you can accomplish a lot in AutoPlay without any knowledge of scripting at all, even a little bit of scripting practice can make a big difference. You can accomplish far more in a project with a little bit of scripting than you ever could without it. Scripting opens the door to all sorts of advanced techniques, from actions that are only performed when specific conditions are met, to functions that you can define, name and then call from anywhere else.
What You'll Learn
In this lesson, you'll learn how to:
• Display a message
• Use a variable
• Add an if statement
• Test numeric values
• Set a button object's text
• Concatenate strings
• Compare strings
• Use a for loop
• Create functions
How Long Will It Take?
This lesson takes approximately 30 minutes to do.
For this lesson, we're going to create a new project from scratch. If you're continuing from Lesson 9, you should still have AutoPlay running with the Tutorial project open.
If not, you'll need to open AutoPlay Media Studio first.
1 ) I f y ou h ave A u t o P l ay r unning wi t h t h e Tu t o r i a l p r oj ec t op e n, c hoo s e Fil e > Ne w.
Choosing File > New will open the Create New Project dialog. Once it opens, move on to step 3.
2 ) O r , i f y ou don ' t h ave A u t o P l ay r unning, u s e t h e St ar t me nu t o
l a un c h t h e A u t o P l ay M e di a St udio p r og ram . Wh e n t h e W e l c o me di a log a pp ear s , c li ck on " Crea t e a n e w p r oj ec t . "
You'll find AutoPlay Media Studio under:
Start > Programs > Indigo Rose Corporation > AutoPlay Media Studio 8
Once the program launches and the Welcome dialog appears, click on the "Create a new project" option. This will open the Create New Project dialog.
3 ) Name y ou r p r oj ec t L e ss on 10 .
You want to replace the default text with a unique name for this project, so highlight all of the text in the Name your project field and type Lesson 10.
This name will be used for the project folder and the project file.
4 ) S e l ec t t h e B l a n k P r oj ec t a nd c li ck O K .
When you click OK, the Create New Project dialog closes, AutoPlay sets up the Lesson 10 project folder and project file, and the new blank project is loaded into the design environment.
You're now ready to learn some basic scripting.
Displaying a Message
Okay, first things first. Before we get to any of the fancy stuff, let's make a script that does something really simple, like displaying a message to the user.
First, though, we need a place to put our script. For convenience, let's use a button object's On Click event.
1 ) A dd a bu tt on obj ec t t o t h e p a g e .
One quick way to add a button object is to right-click on the page and choose Button from the right-click menu. Then just select the button you want to use from the list of button files on the Select File dialog, and click OK.
Note: It doesn't matter what button you choose, so pick whichever one you like.
![]()
2 ) D oubl e - c li ck on t h e bu tt on obj ec t , c li ck on t h e S cr ip t t a b, a nd c li ck on t h e On C li ck eve n t t a b.
You want to add an action to the object's On Click event, so open the object's Properties dialog, switch to the Script tab, and make sure you're editing the script for the On Click event.
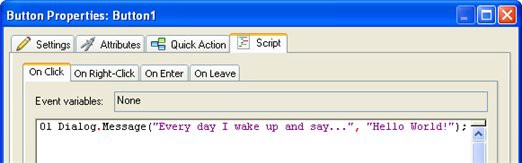
3 ) On t h e f i r s t lin e , t y p e :
D i a log. M e ss a g e ("E very d ay I w ake up a nd s ay ... " , " He llo Wo r ld !" ) ;
This script consists of a single Dialog.Message action which passes "Every day I wake up and say..." as the string to display in the title bar, and "Hello World!" as the string to display on the dialog. The script should look like this when you're done:
![]()
Note: Although this script only has a single action, scripts can be much longer. In fact, there's no limit to how long scripts can be.
4 ) C li ck O K t o c lo s e t h e P r op er t i e s di a log. P re ss F 5 t o p rev i e w t h e
p r oj ec t . Wh e n t h e p rev i e w a ppli ca t ion a pp ear s , c li ck on t h e bu tt on t o s ee t h e me ss a g e .
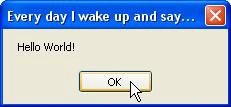
Clicking on the button triggers its On Click event and performs any script that has been added to it. In this case, the script consists of a single call to the Dialog.Message action, which displays the following message:
5 ) C li ck O K t o c lo s e t h e di a log me ss a g e bo x , a nd ex i t f r o m t h e p rev i e w.
Click OK on the message to close it, and then exit from the preview and return to the design environment.
Tip: You can exit from the preview by pressing Alt-F4.
![]()
Using a Variable
One of the most powerful features of scripting is the ability to make use of variables. Variables are essentially just "nicknames" or "placeholders" for values that may need to be modified or re- used in the future. Each variable is given a name that you can use to access its current value in your script.
![]()
Note: We say that values are "assigned to" or "stored in" variables. If you picture a variable as a container that can hold a value, assigning a value to a variable is like "placing" that value into a container.