Note that the video starts playing automatically as soon as the page is shown. This is because the video object's AutoStart setting is set to "True." (The same thing will happen each time the users navigate to this page in the full application.)
Previewing the page is often faster than previewing the whole project, because AutoPlay doesn't have to build the whole project-it only has to build one page. More importantly, you don't have to navigate all the way from the start page just to get to the page that you want to test. (Which also means you can try out a page before you've added any Page.Jump actions to get to it from the start page.)
9 ) Wi t h t h e p rev i e w a ppli ca t ion s e l ec t e d, p re ss A l t + F 4 .
Pressing Alt+F4 when the preview application is selected (i.e. when it's the "foreground application" in Windows) immediately closes the application.
You can use this method of exiting from the preview when your application doesn't have a title bar.
Of course, since your application does have a title bar, you can also exit from the page preview by clicking the Close button.
Adding Custom Video Controls
In addition to the built-in video controls on the video object's control panel, you can use AutoPlay's video actions to provide your own "homemade" video controls.
1 ) S e l ec t t h e v id e o obj ec t . I n t h e p r op er t i e s p a n e , s e t C on t r ol St y l e t o " N on e . "
Changing the ControlStyle setting from "Basic Blue" to "None" removes the control panel from the object completely.

2 ) S e l ec t t h e " Back " bu tt on obj ec t ( B u tt on 3 ) a nd p re ss C t r l + D t o dupli ca t e i t . P re ss C t r l + P t o unpin t h e n e w obj ec t , a nd m o ve i t down b e low t h e v id e o obj ec t .
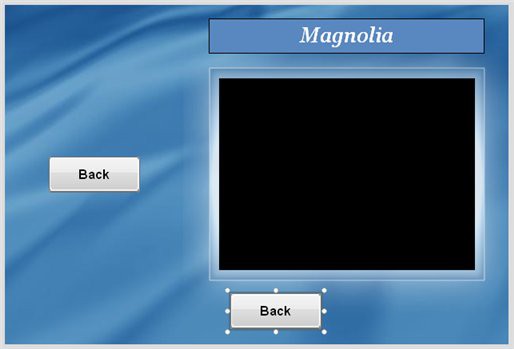
Now, we could just add a new button object, and set it up to be like the other buttons in the project, but using the Back button as a template is much easier. This way, we don't have to set the object's Normal, Click and Highlight colors-they're already set for us.
Note that the new object's name is Button1, since 1 is the first number that isn't used in a button object's name on this page.
Wait a minute...isn't this the second button that you've added to this page? Indeed it is! But since the name "Button1" hasn't been taken yet, it gets used first. Remember how the "Back" button carried its name over when you copied and pasted it in lesson 4? Since that button's name is Button3, this leaves the first two default names "open" for new button objects to use on this page.
3 ) I n t h e p r op er t i e s p a n e , c h a ng e t h e obj ec t ' s Wid t h t o 55 a nd i t s He igh t t o 27 . C h a ng e t h e f on t F am il y t o V er d a n a , a nd t h e f on t S i z e t o 6 . S e t B old a nd I t a li c bo t h t o " T r u e . " C h a ng e t h e obj ec t ' s T ex t t o
P L A Y .

This is going to be our play button. Setting the font to 6-point Verdana makes the text small enough to fit on a very small button, without being too hard to read. (Making the text use only capital letters helps get the most visibility out of such a small font.)
4 ) I n t h e p r op er t i e s p a n e , s e t Y O ff s e t t o 1 .
The YOffset setting allows you to fine-tune the vertical position of the text on the button object. It specifies the number of pixels that the text should be offset vertically from its default position.
Sometimes, changing an object's size or font settings will cause the text to be rendered off-center. In this case, the text was being drawn a little bit too high with the default offset of 0. Setting the Y offset to 1 moves the text down by one pixel, so that everything is in its right place on the object again.
5 ) C li ck on t h e P L A Y bu tt on, a nd p re ss C t r l + D t o dupli ca t e i t . C h a ng e t h e n e w obj ec t ' s T ex t t o P AU SE .
This will give you an exact copy of the play button.
![]()
Tip: You can replace the button image that is shown in a button object by dragging a new image onto it with the Shift key held down.
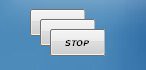
6 ) C li ck on t h e P AU SE bu tt on, a nd p re ss C t r l + D t o dupli ca t e i t . C h a ng e t h e n e w obj ec t ' s T ex t t o S TO P .
Once again, you want to duplicate the object and end up with a similar STOP button.
You should now have a total of three little button objects: one with the word PLAY on it, another with the word PAUSE on it, and a third with the word STOP.
Note that the name of the third button-the one with the word STOP on it-is not Button3, but Button4. This is because the name "Button3" was already taken by the Back button. So, AutoPlay skipped ahead to the next available default name for a button object on this page, which in this case was "Button4."
7 ) Tu r n o ff A lign t o P a g e / D i a log m od e .
Make sure Align to Page/Dialog mode is turned off. (An easy way to check this is to right-click on an object, and choose Align. If Align to Page/Dialog mode is on, the To Page/Dialog item will have a box around it.)
If Align to Page/Dialog mode is on, choose Align > To Page/Dialog to turn it off.
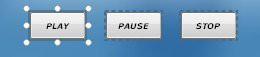
8 ) Dra g t h e S TO P bu tt on t o t h e r igh t a bi t . S e l ec t a ll t h ree bu tt on obj ec t s , make t h e P L A Y bu tt on do m in a n t , a nd c hoo s e A lign > Top, f ollow e d b y A lign > D i s t r ibu t e H o r i z on t a l.
The goal is the get the three objects lined up horizontally and distributed evenly, with PLAY on the left and STOP on the right, like this:
9 ) G r oup t h e t h ree bu tt on obj ec t s t og e t h er a nd ce n t er t h em b e n ea t h t h e v id e o obj ec t .
Select all three button objects, and press Ctrl+G to group them. Then center the group horizontally beneath the video object.
You should end up with the PLAY, PAUSE and STOP buttons in a row below the video object, like this:
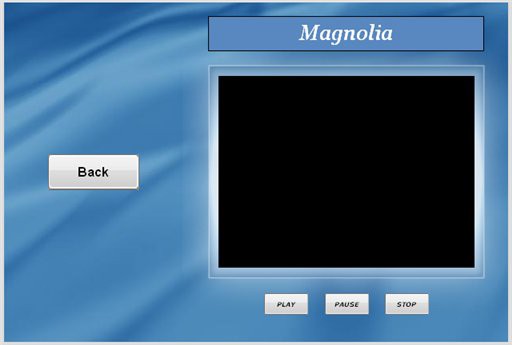
![]()
Tip: You aren't limited to buttons with text on them, either. If you'd rather have buttons with iconic symbols for things like play, pause and stop, you can easily create your own buttons using the AutoPlay Media Studio Button Maker, which you can access by choosing Tools > Button Maker.
10 ) U ng r oup t h e bu tt on obj ec t s a nd pin t h em .
Now that you have the buttons where you want them, ungroup the objects by selecting one of them and pressing Ctrl+Shift+G, and then pin them by pressing Ctrl+P.
Ungrouping the objects will make it easier to select them independently in the next exercise. Pinning the objects will prevent them from being repositioned by accident.
Taking Control of the Video with Actions
Now that we have our PLAY, PAUSE and STOP buttons laid out on the page, let's make them actually play, pause and stop the video.
To do that, we just need to add an action to each button.
1 ) C li ck on t h e p a g e s u r f ace t o d e s e l ec t t h e obj ec t s .
Clicking on the page surface deselects the objects, so that none of the objects on the page are selected. (Make sure you click somewhere on the page surface where there isn't an object. If you select an object by accident, just click again somewhere else.)
2 ) D oubl e - c li ck on t h e P L A Y bu tt on, a nd c li ck on t h e S cr ip t t a b.
Double-clicking on an object opens up the Properties dialog for that object. Clicking on the Script tab switches to the script editor so you can edit the object's actions.
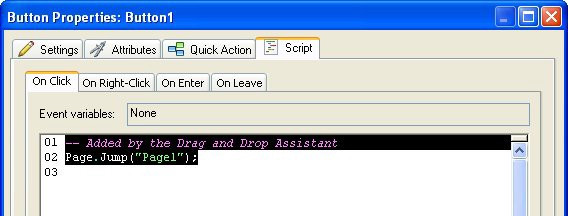
3 ) I n t h e s cr ip t e di t o r , c li ck on t h e On C li ck t a b. Re pl ace t h e
P a g e . J u m p ac t ion wi t h a V id e o. P l ay ac t ion. S e t t h e V id e o. P l ay ac t ion ' s Obj ec t Name p arame t er t o " V id e o 1 " .
Note that this button object already has a Page.Jump action assigned to its On Click event. (The action was copied over from the Back button when you duplicated that object.) We're going to replace this Page.Jump action with a Video.Play action.
Replacing the action is easy enough-just remove the old action, and add another one in its place. To remove the old action, simply highlight all of its text on the script editor, and press the delete key.
![]()
Note: As you've probably noticed, actions are just text instructions that get interpreted by AutoPlay. You can edit these instructions directly, just as you would edit text in a Word document.